Introduction
Dry fire Drills menu allows you to create custom dry fire drills and monitor the progress of this specific drill over time via extended statistics and graphs in the Drills app thanks to Smart mode.
Or train with regular PAR time signals in classic dry fire mode.
To learn more about creating and using drills in the Drills app, go to this Guide.
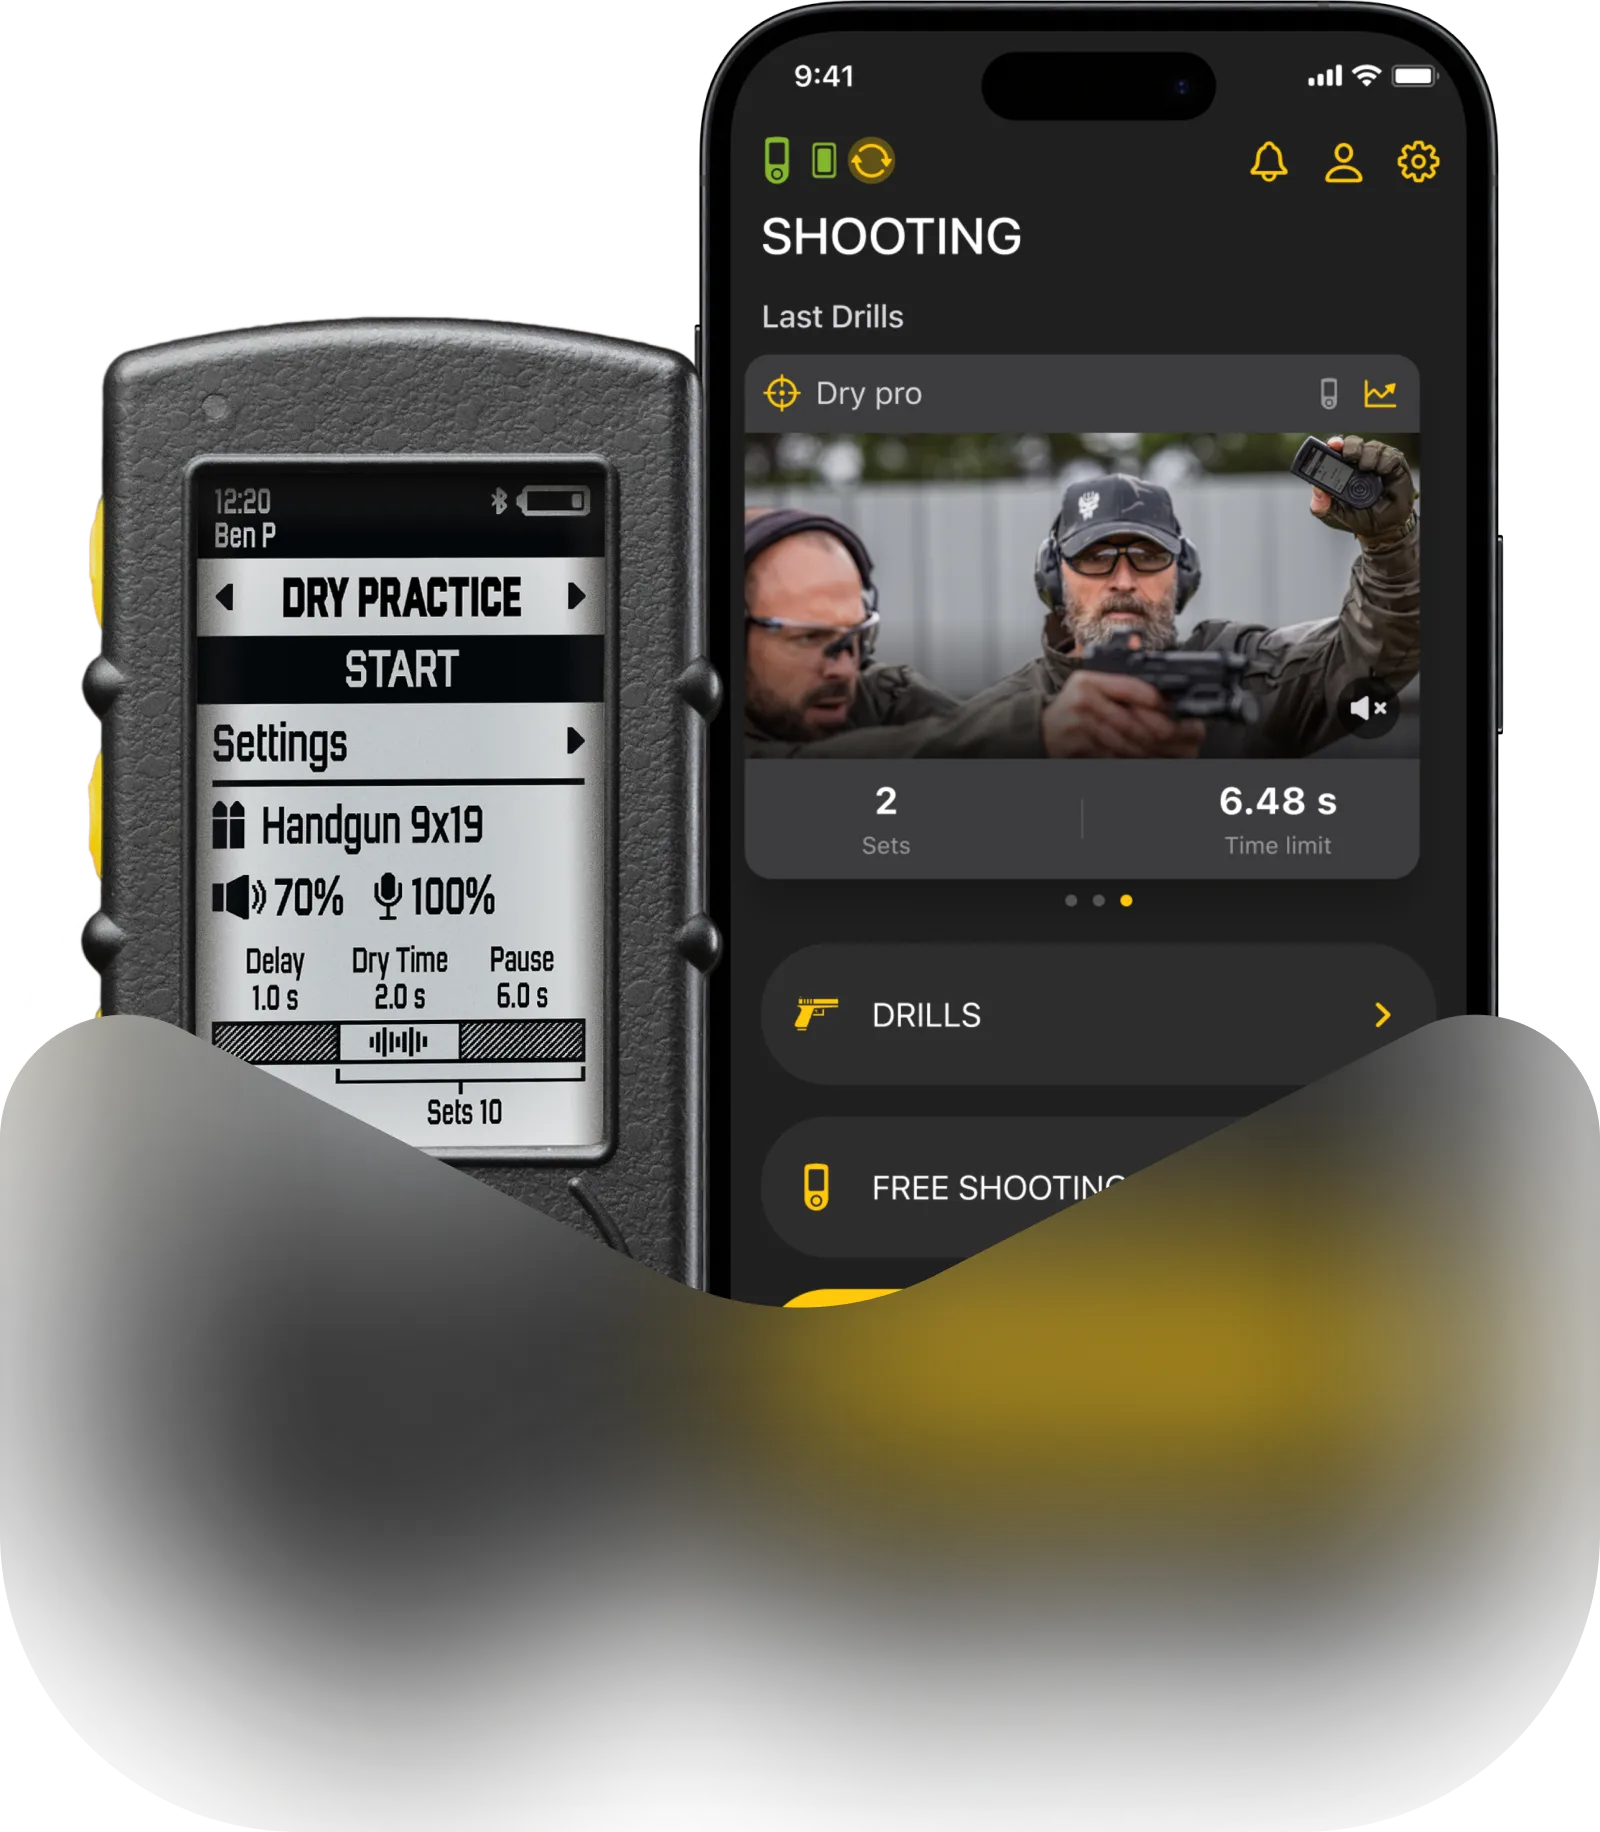
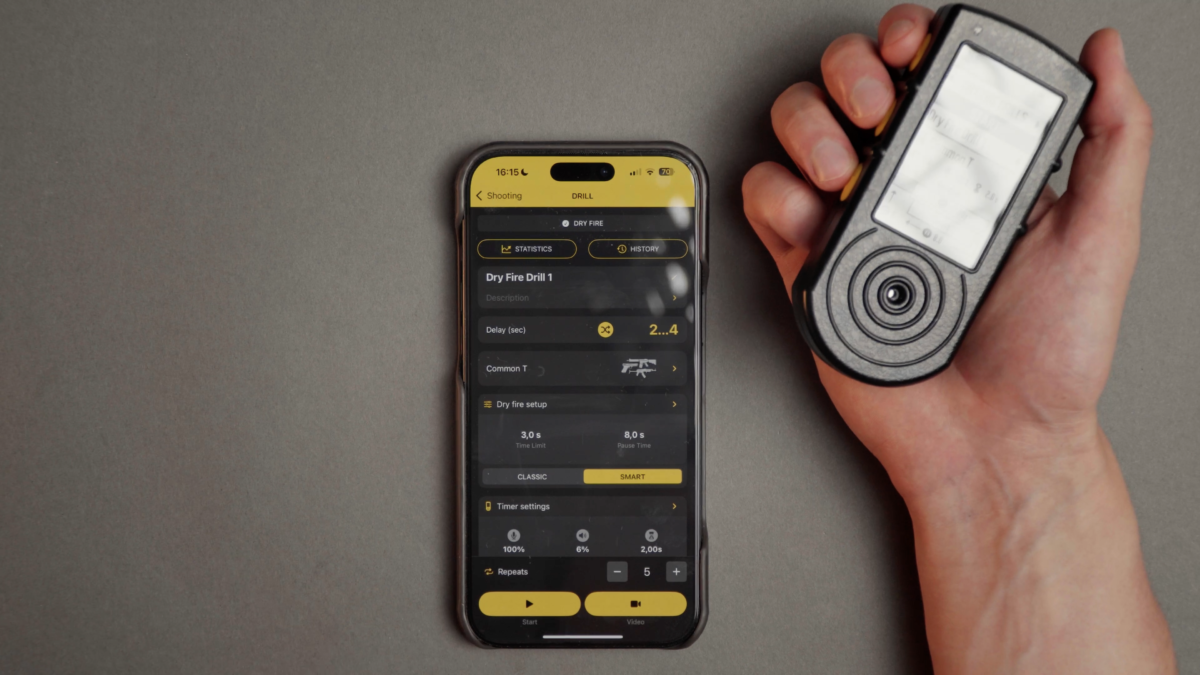
On the home screen you will see:
Selected Dry fire drill
Selected Gun type
Buzzer volume
Sensor sensitivity
Waiting time
(To learn more about these settings go to Presets and Gun types)
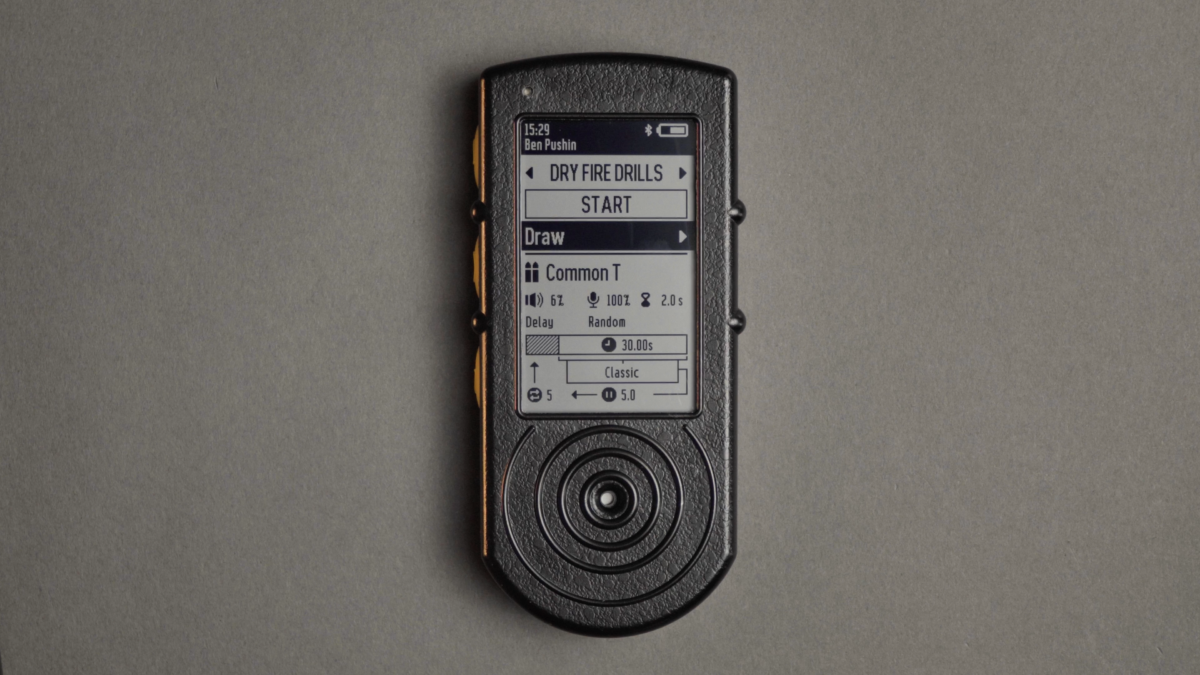
Below is Dry fire mode – Classic or Smart
Timer Programming settings (PAR time setup)
Delay before start
Total time – Sum of all time limit and pause intervals
Pause time – reset time between repetitions
Reps – number of repetitions the timer will make
Creating a drill
You can create a drill on the SG Timer or in the Drills app.
To learn more about creating and using Drills in the app, go to this Guide.
To create a new Drill select “add more”.
The Drill will get a default name. To change in, use the Drills app. The name will change on the timer too.
⚠️ If you delete the Drill on the timer, it will delete in the app and vice versa. Same applies to all settings and changes that you do. Timer and Drills app have 2 way synchronization.
Select your Gun Type. Gun type is a combination of sensor settings like sensitivity, volume and echo filter.
Gun types can be created only in the Drills app. On SG Timer you can only modify existing ones. Note that it will overwrite settings in this gun type including in the Drills app.
To learn more about these settings go to Presets and Gun types.
Choose the delay between instant, random or custom.
Classic vs Smart Mode and PAR
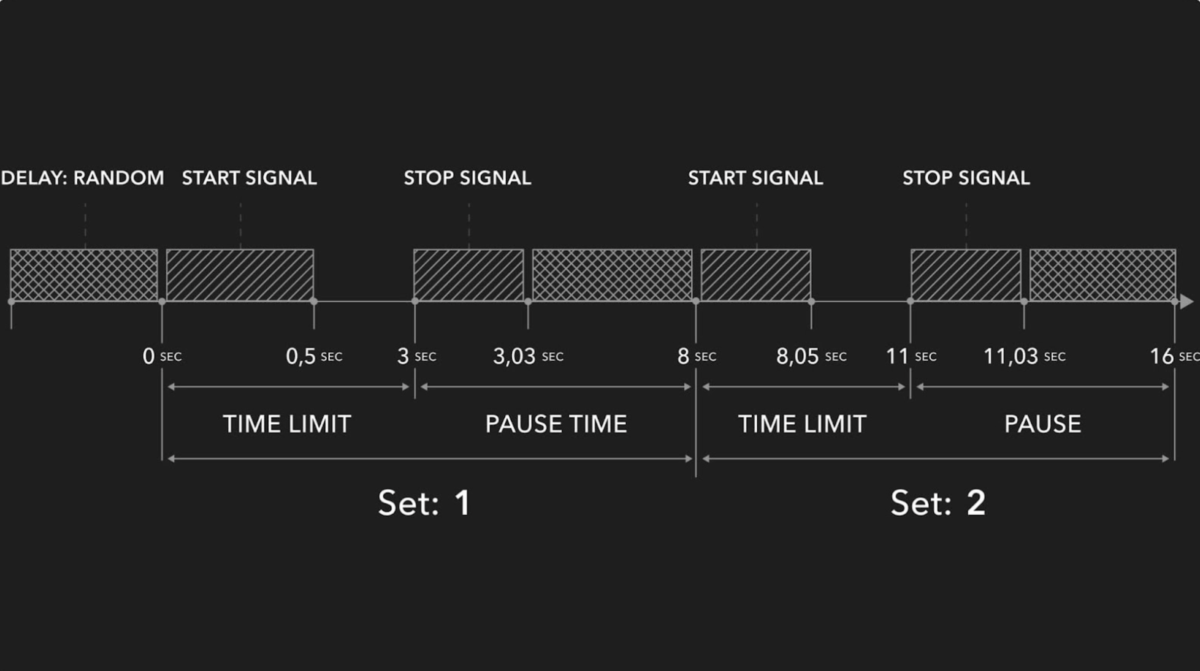
Classic mode. In Classic mode the timer will just cycle in repetitive PAR mode without registering any sounds.
For example:
Time limit – 3 sec
Pause time – 8 sec
Delay – random
Repetitions – 5
The timer will give a start signal, count down 3 seconds and give an end signal when the time is up. Then it will count down 8 seconds to give the time to reset, and start counting down random delay interval (1-4 sec) to make the start signal unexpected for you. Then it will give a start signal again and repeat the sequence 4 more times.
⚠️ In this case you will not record your actual dry fire time. You will need to rely on your own perception to decide whether you made it before the beep or not, which is not very reliable.
⚠️ Sessions trained in classic mode will not appear in drill stats in the app, as there’s nothing to track.
Smart mode
In Smart mode, the timer will register the actual sound of a hammer fall, or any other short and distinct sound you want to capture in your training.
During practicing, the timer may pick up other unwanted sounds, like reload, slide, gear rattle, etc. To avoid this, use the “Waiting time” setting in “Sensor setup”. During the practice, after completing the final action (pulling the trigger), you need to wait the “Waiting time” period without making any noises until you hear the end signal.
For example:
Time limit – 3 sec
Pause time – 8 sec
Waiting time – 2 sec
Delay – random
Repetitions – 5
The timer will give a start signal and count down 3 seconds.
Lets say you pull the trigger at 3.8 sec.
It will not give you an end signal after 3 sec. It will give a confirmation signal only once the Waiting time interval passes after the last sound you made. In this case – at 5.8 sec, and it will show that you were 0.8 sec late.
To learn how Waiting time works, continue reading this manual.
After the timer gives you a confirmation signal, it will count down 8 seconds to give the time to reset, and start counting down random delay interval (1-4 sec) to make the start signal unexpected for you. Then it will give a start signal again and repeat the sequence 4 more times.
This allows you to see the actual time it took you to pull the trigger, reload, etc., instead of guessing whether you pulled the trigger before, during or after the end signal in Classic mode.
⚠️ During Smart dry fire, it is recommended to keep the timer on the belt facing the weapon or on a table right under the weapon. You may need to test and adjust the sensitivity to your trigger. Try to look at the timer display when you pull the trigger to make sure the timer registers the sound.
⚠️ You may change the mode during your training, but sessions made in classic mode will not appear in drill stats in the app, as there’s nothing to track.
“Waiting time” is a safe zone period. During dry fire there are many extraneous sounds like reload, slide or gear rattle, which may be perceived by the timer as a hammer fall. Since hammer fall is very similar to all those other sounds in terms of loudness and sound, it makes it impossible to distinguish electronically.
Therefore, the timer counts down the time from the last sound it registered, and if it doesn’t register any more sounds during this period, it acknowledges this sound as a hammer fall and ends the set.
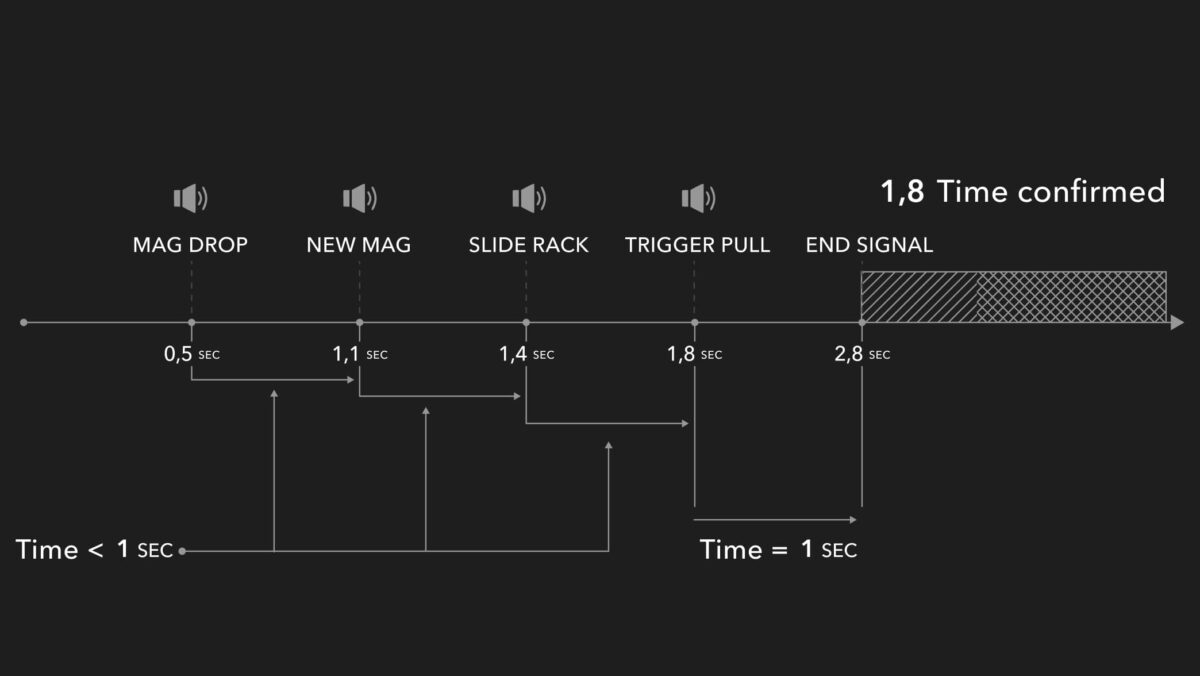
For example, let’s take a reload drill. Waiting time is set to 1 second.
The mag drops at 0.5 sec — timer registers it, but does not acknowledge it as a finish yet, starts counting 1 second.
At 1.1 sec you insert a new mag. Timer registers the sound, but doesn’t acknowledge it, because it’s been less than 1 second from the last sound. It starts counting 1 second again.
1.4 sec — slide racking sound. Same as with the previous sound.
At 1.8 seconds you pull the trigger and freeze for 1 second after that. Timer registers this sound and starts counting 1 second. And since you didn’t make any more sounds after the trigger pull it acknowledges this sound and gives an end signal.
This way you don’t have a pile of unusable timecodes — only the actual time of execution.
You can also program the timer to your needs by adjusting the waiting time.
During Training in classic mode on the screen you will see:
Set count
Session phase (time limit / pause time / delay)
Time left in current phase
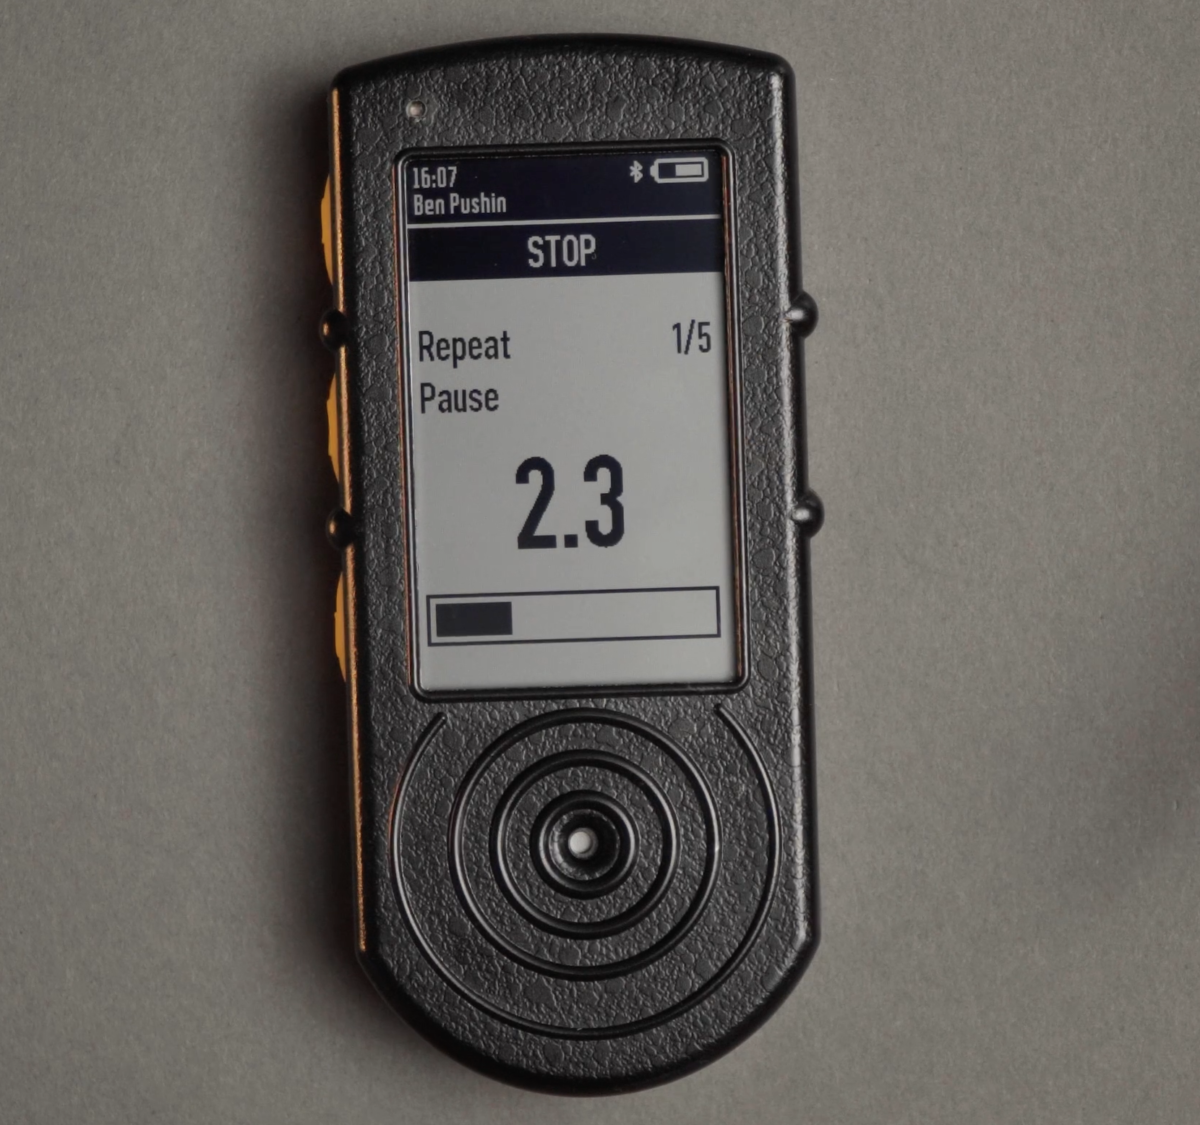
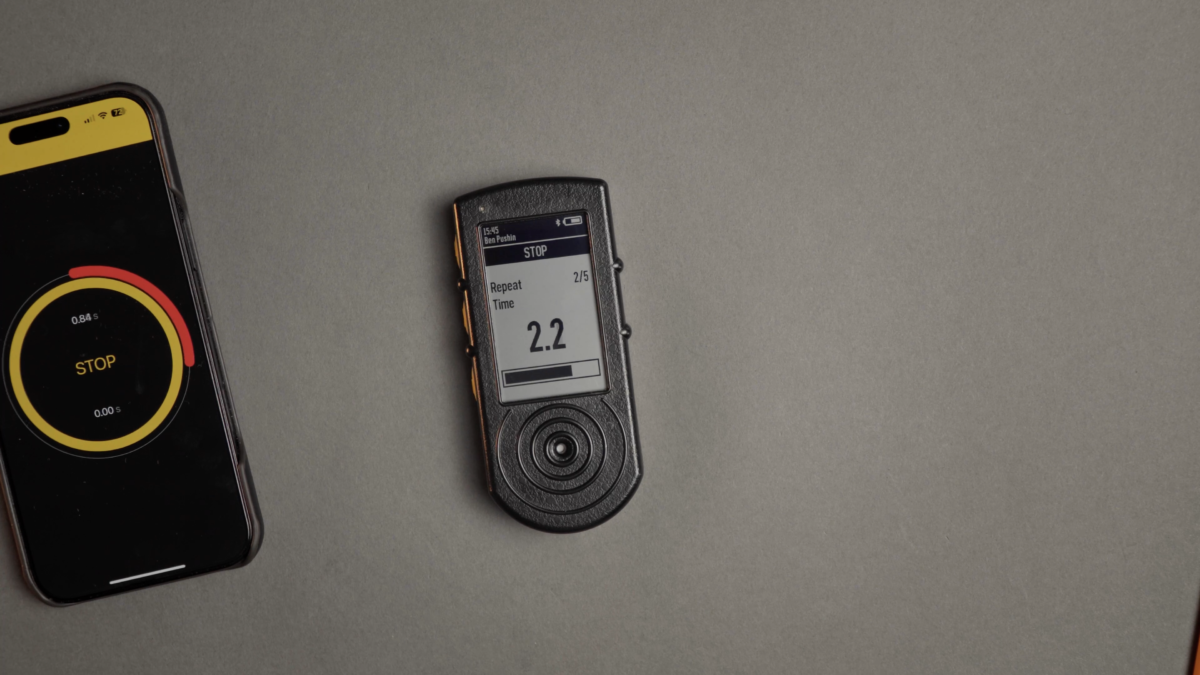
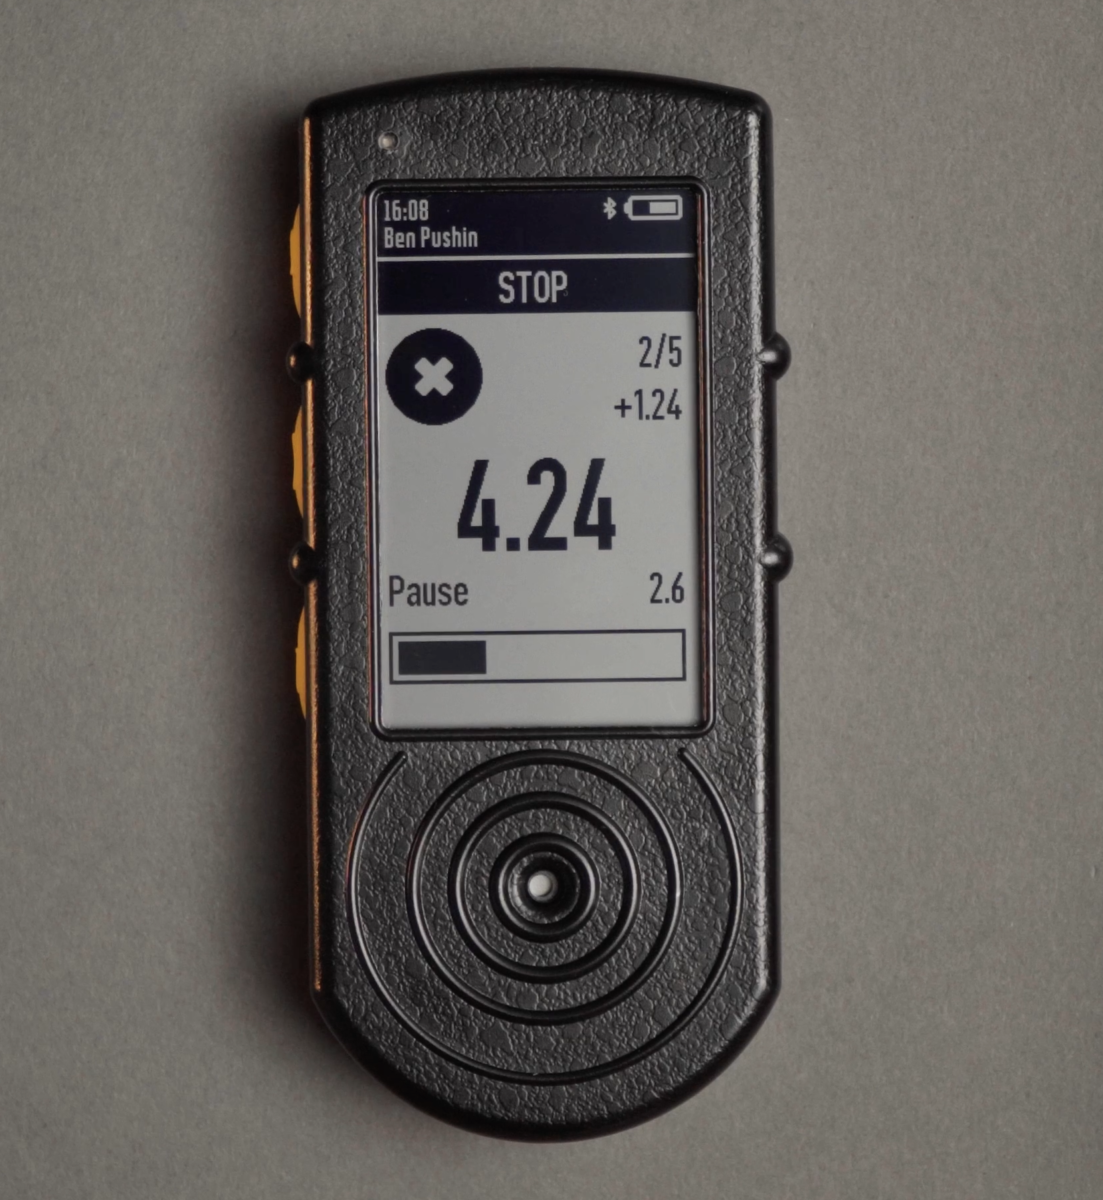
During Training in smart mode on the screen you will see:
Set count
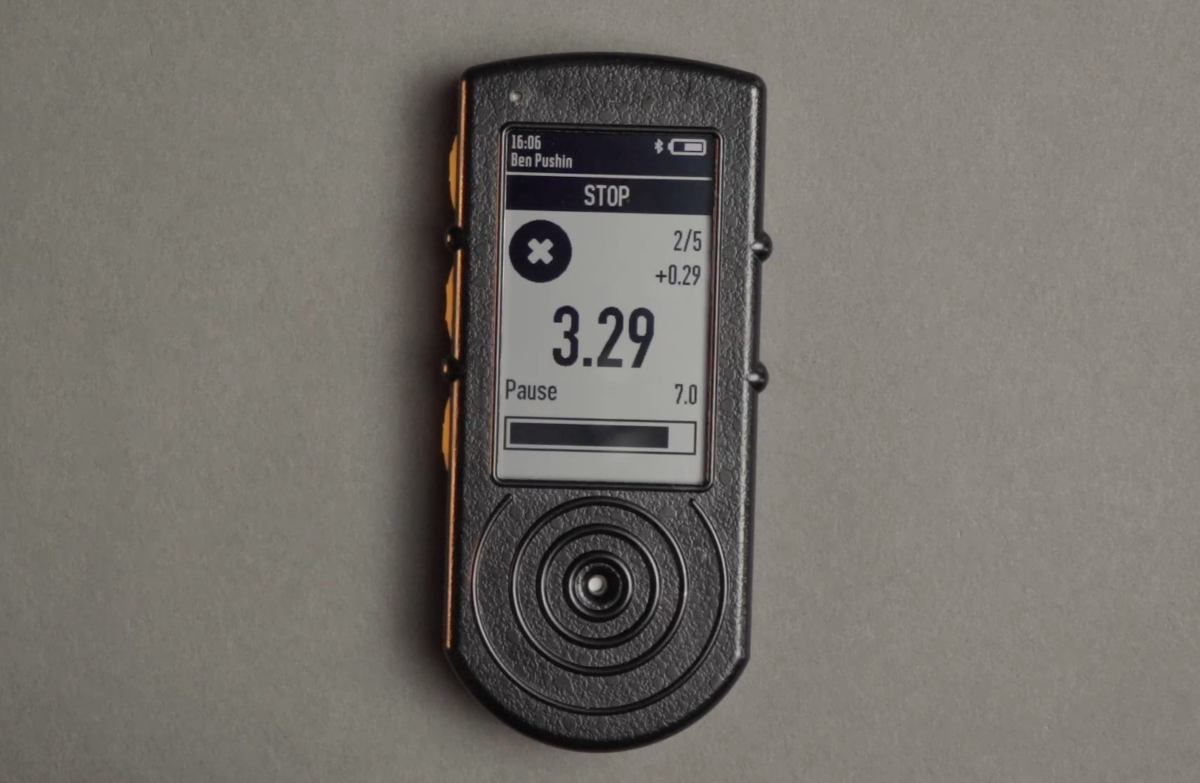
Session phase. Mic icon means the time limit is active and the timer is registering sounds. Checkmark means pause time phase – you met the goal. Cross means pause time phase – you didn’t meet the goal.
Sounds captured.
Time left in the current phase.
Delta between the goal and the execution time.
A big number in the center of the screen means the final time confirmed by the timer.
If you dry fired in classic mode, no results will be shown on the timer. The session will be saved in the activity on the timer, if you filmed a video of this session.
If you dry fired in smart mode, after the drill is finished you will see the screen with all your reps. Your execution time will be in the middle and on the right is the delta between your time limit and execution time.
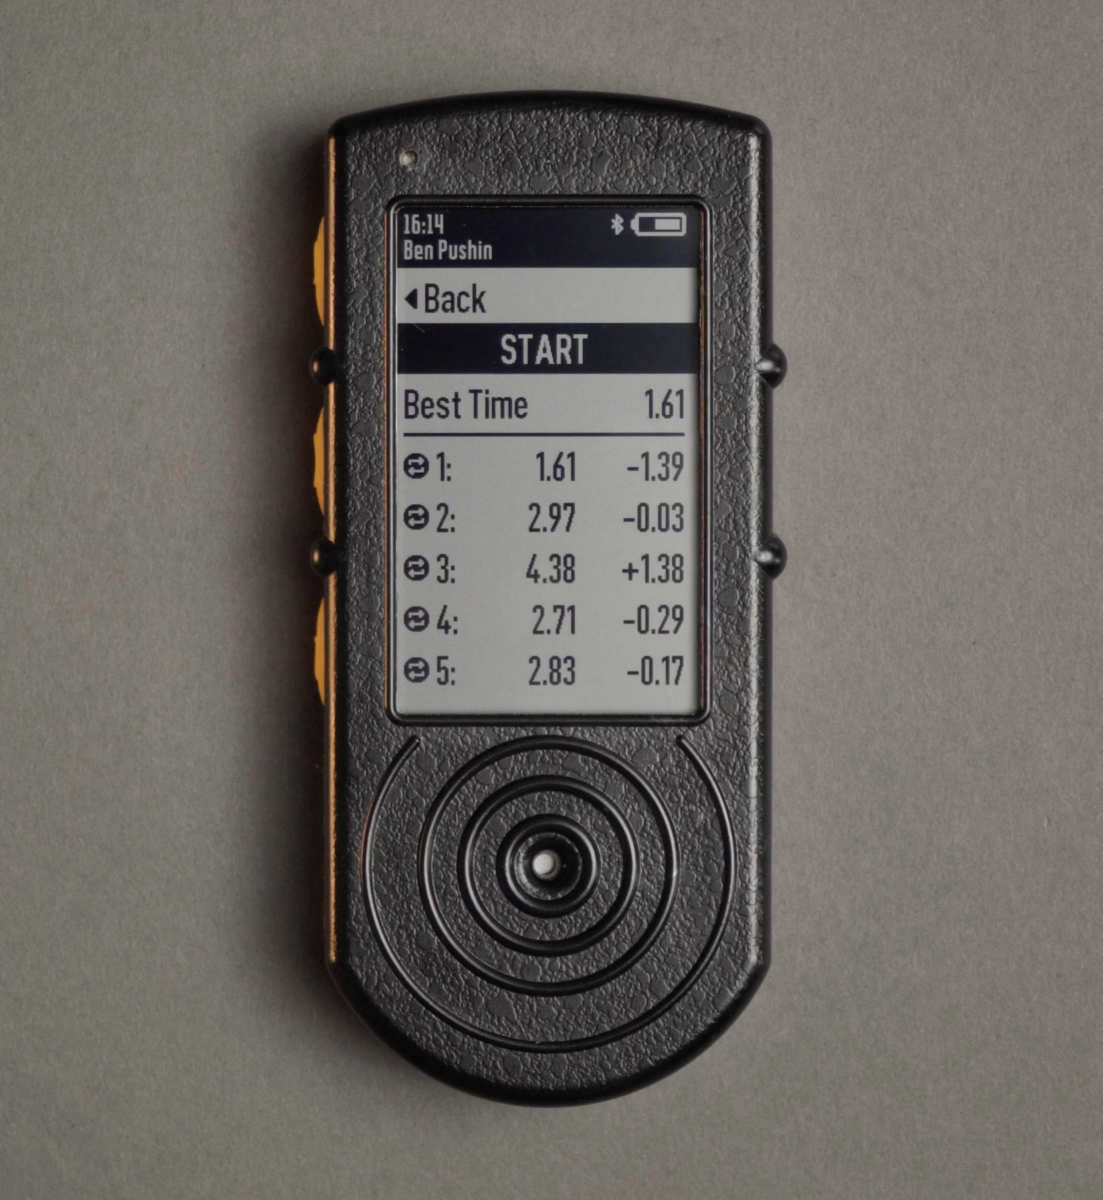
For example if the time limit was 3 sec, and you pulled the trigger in 2.7, the timer will show -0.3.
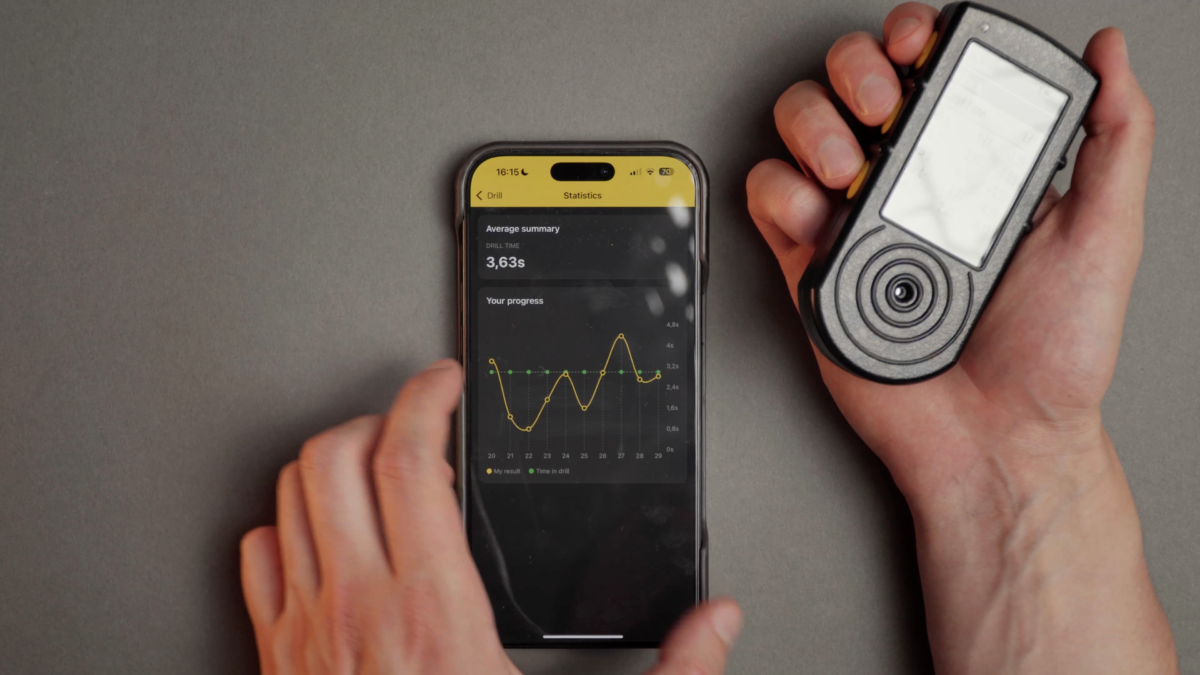
Your results will be saved in “History” and sent to the Drills app once you connect the timer to it.
Learn more about “History” tab here.
⚠️ It is not necessary to have the Timer always connected to the Drills app. All your history and changes you made to drills will appear in the Drills app once you connect them.
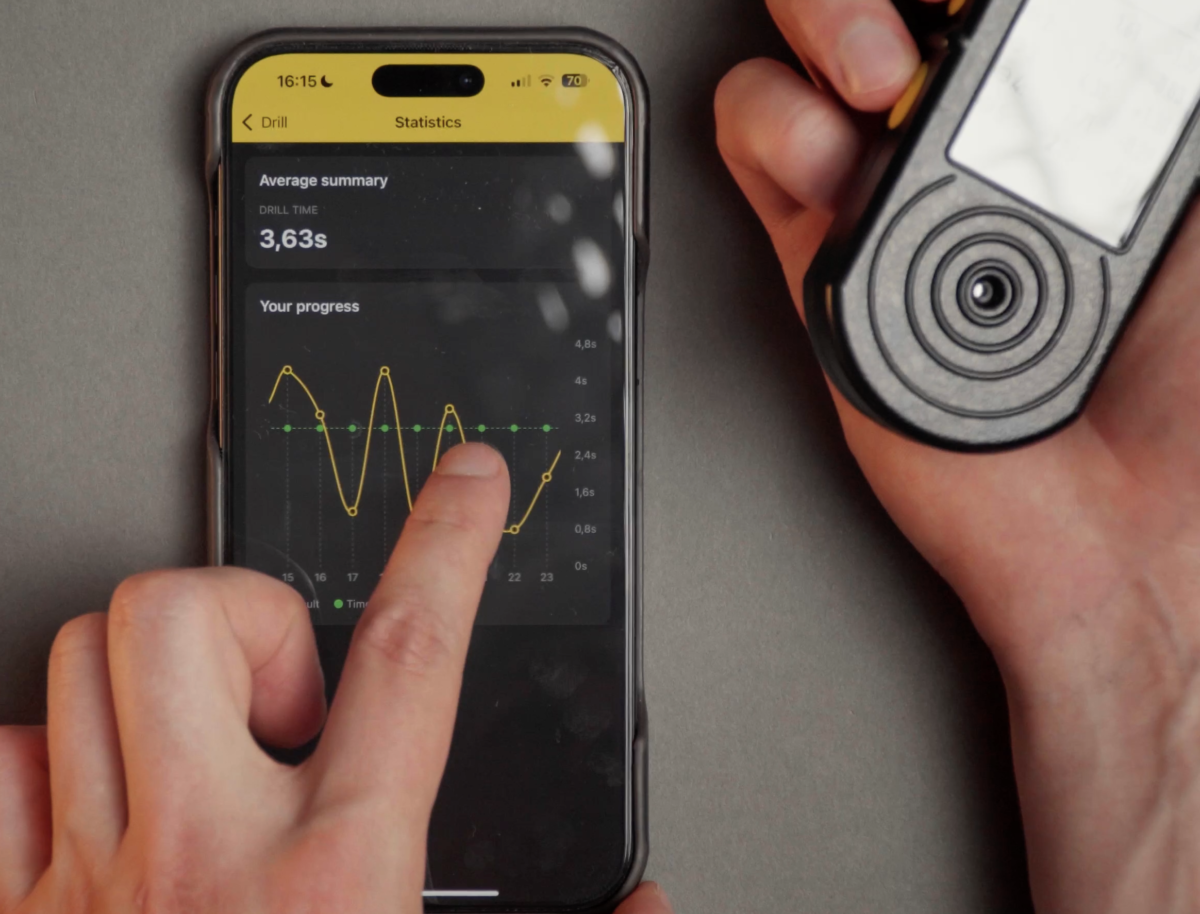
Learn more about Drills statistics in the app here.