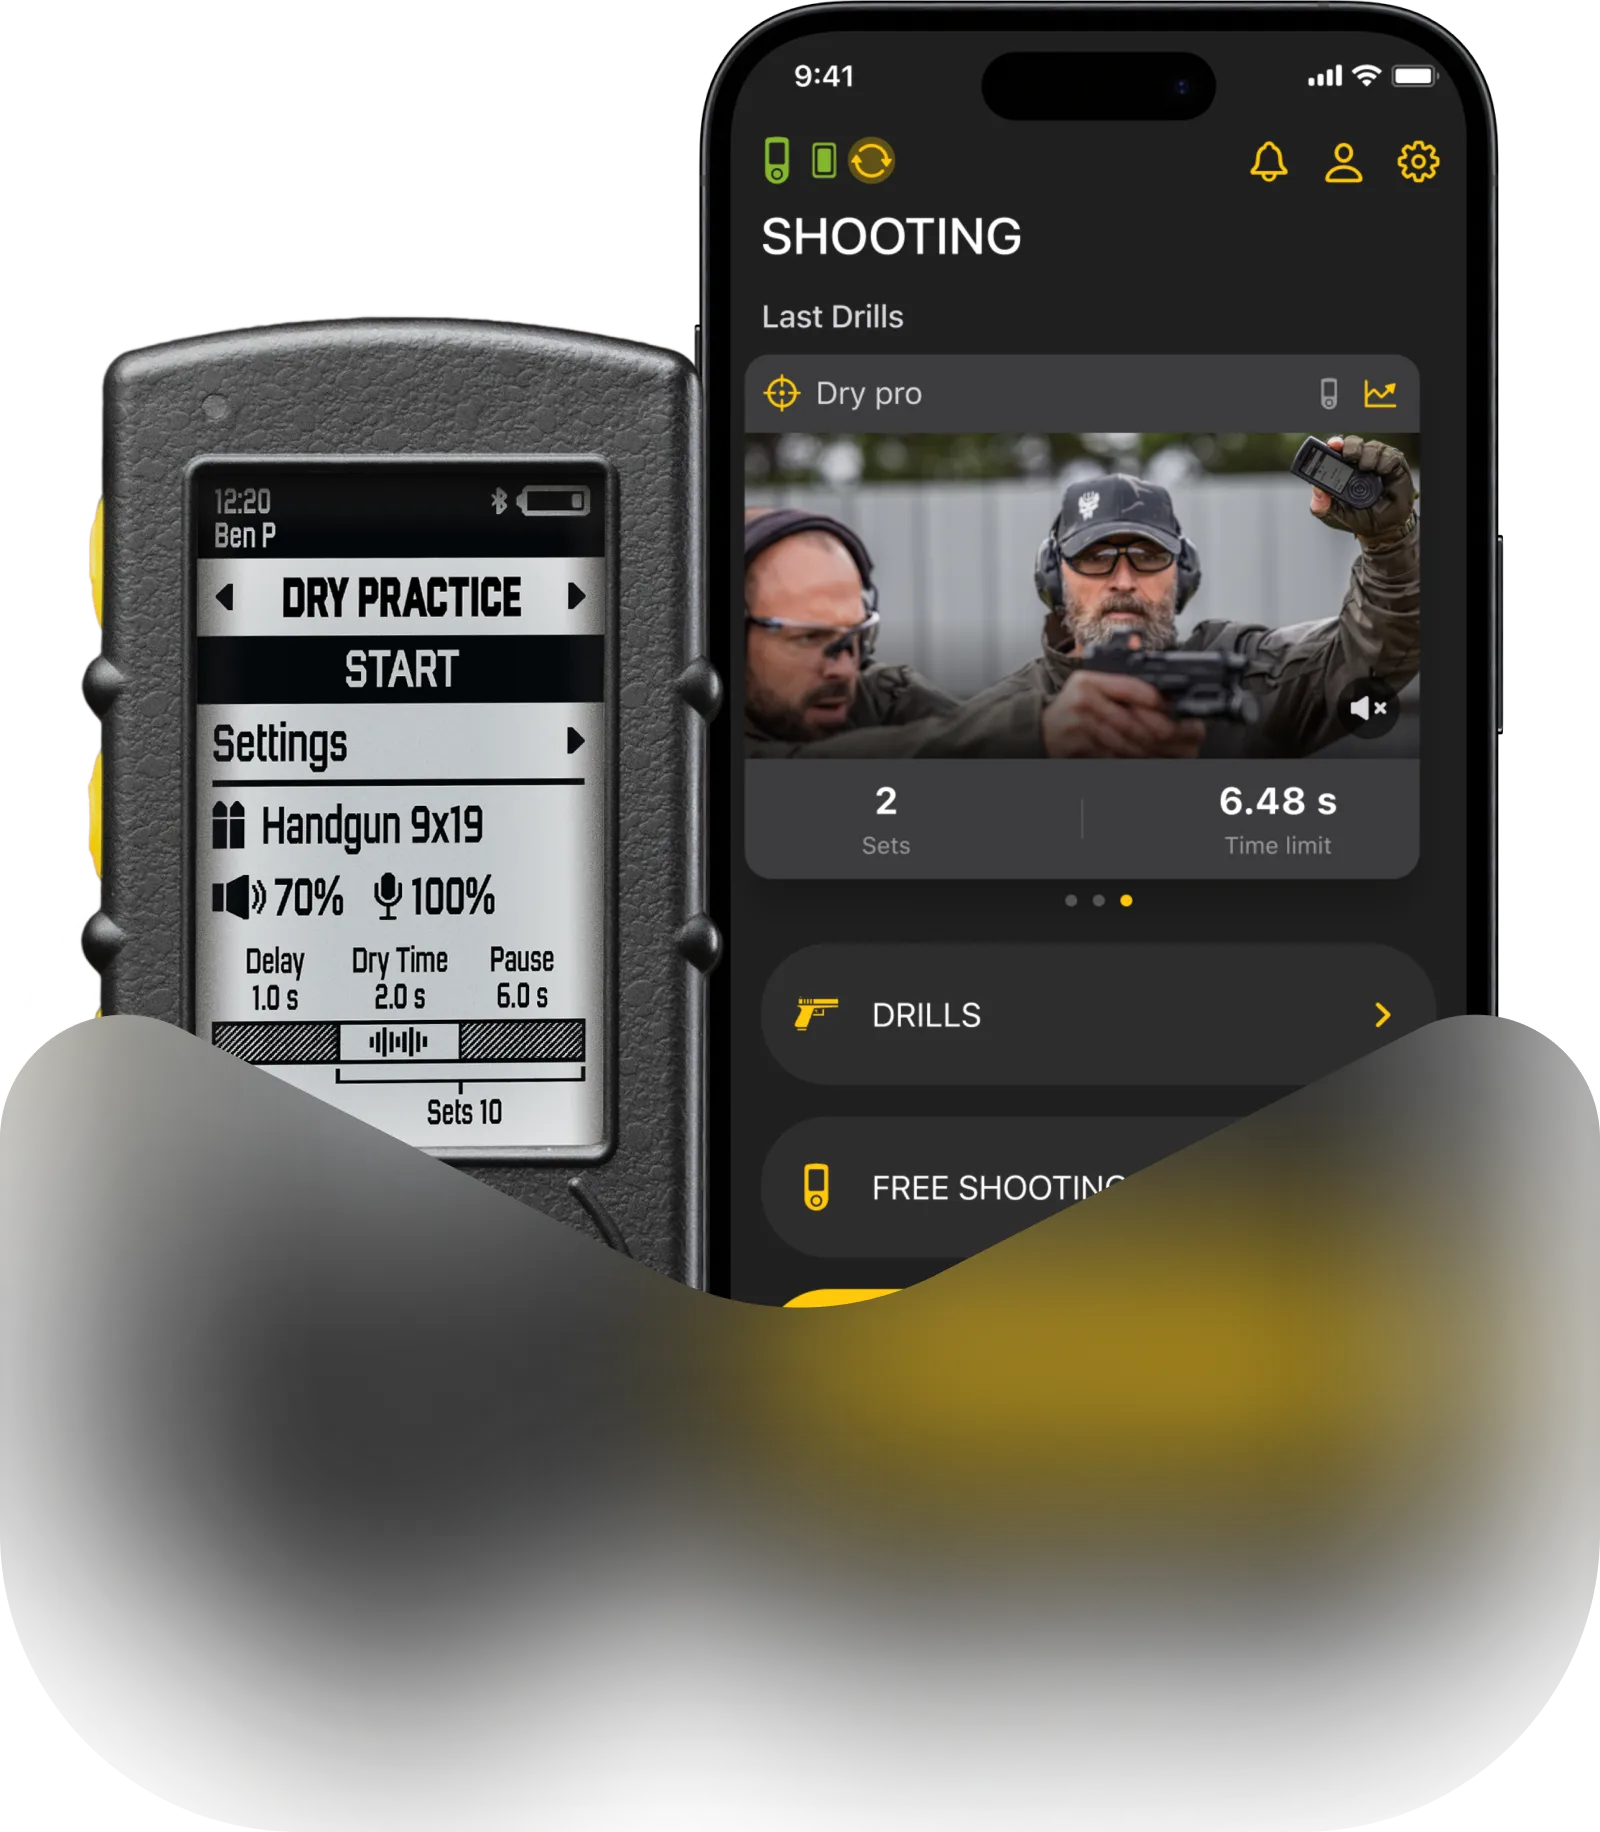
Dzięki połączeniu w czasie rzeczywistym między timerem a aplikacją, możesz nagrywać swoje sesje treningowe z danymi z timera nałożonymi bezpośrednio na wideo. Funkcja jest dostępna w każdym trybie strzelania i treningu na sucho.
Nagrywanie wideo
Aby nagrać wideo, przejdź do dowolnego ćwiczenia strzeleckiego lub treningu na sucho i stuknij „Wideo”. Przycisk „Rec” po lewej stronie steruje nagrywaniem, ale możesz też po prostu nacisnąć „Start”, aby rozpocząć sesję na timerze. Nagrywanie wideo również się rozpocznie. Jeśli naciśniesz „Start” na timerze, wideo także zacznie się nagrywać. Możesz więc uruchomić nagranie zarówno z telefonu, jak i z timera.
Gdy sesja się zakończy, stuknij w czerwony ikonę „Stop”, aby zakończyć nagrywanie.

Ustawienia wideo
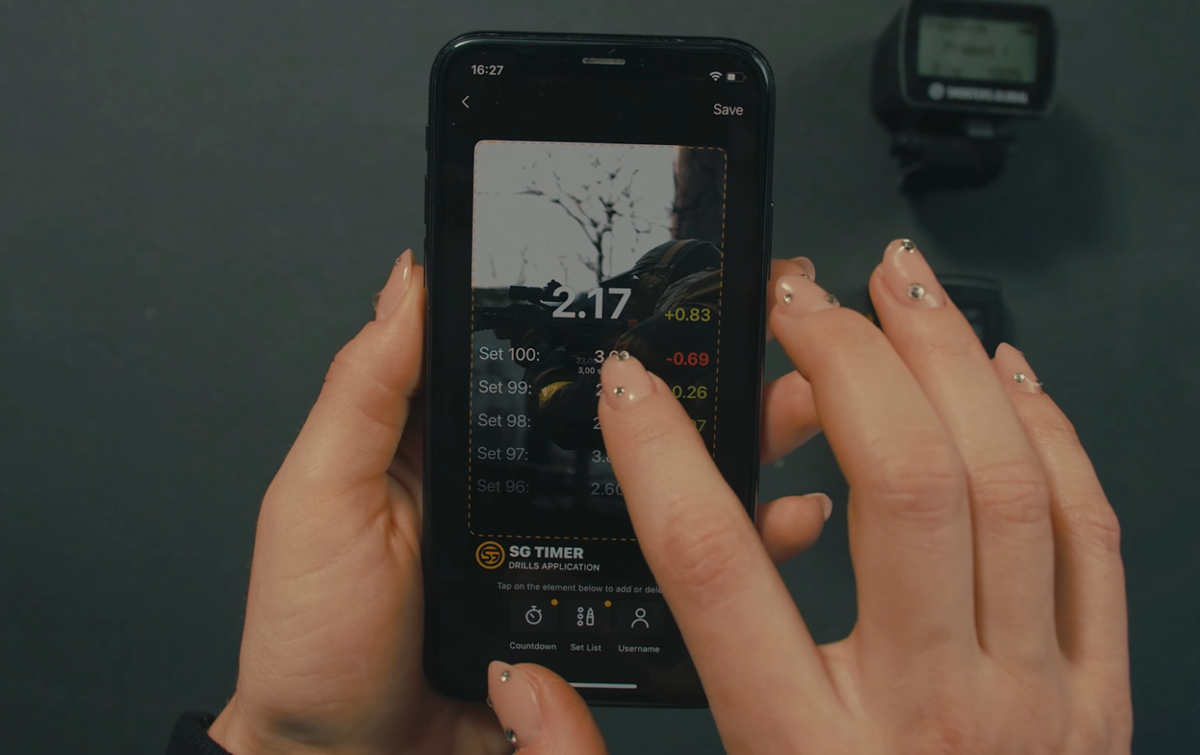
Układ elementów jest całkowicie konfigurowalny. Możesz wyłączyć dowolny element oraz zmienić jego pozycję i rozmiar. Aby to zrobić, przejdź do Ustawień w prawym górnym rogu, a następnie do „Ustawienia wideo”. Układ jest indywidualny dla każdego trybu, więc na przykład możesz mieć jeden układ dla treningu na sucho, a inny dla strzelania. To samo dotyczy orientacji pionowej i poziomej. Możesz przełączać się między nimi za pomocą przełącznika na górze ekranu ustawień wideo.

Kliknij podgląd obrazu, aby przejść do trybu edycji.
🔸 Aby wyłączyć lub włączyć element, stuknij ikonę elementu na dole ekranu.
🔸 Aby przesunąć element, stuknij go na podglądzie, aby go zaznaczyć, następnie stuknij ponownie i przytrzymaj, aby przesunąć.
🔸 Aby zmienić rozmiar elementu, stuknij go na podglądzie, aby go zaznaczyć, następnie stuknij kropkę w rogu zaznaczenia i przeciągnij.
🔸 Po zakończeniu stuknij „Zapisz”.
Podgląd i eksport
Wszystkie filmy są przechowywane w Twojej galerii oraz w „Aktywności”. Znajdziesz je w swoim profilu, klikając przycisk w prawym górnym rogu ekranu. Najpierw filmy są zapisywane na urządzeniu, następnie przesyłane do chmury i tam przechowywane za darmo. Dzięki temu Twoje filmy nie zostaną utracone, nawet jeśli usuniesz aplikację.

Podwójne stuknięcie po lewej lub prawej stronie wideo pozwala przesunąć je o 5 sekund do przodu lub do tyłu.
Naciśnięcie przycisków odtwarzania „do przodu” lub „do tyłu” raz pozwala przesuwać klatka po klatce. Przytrzymanie przycisków spowoduje przewijanie wideo.
Prędkość odtwarzania można zmienić, korzystając z przycisku w prawym dolnym rogu.
Jeśli otworzysz wideo z galerii, możesz także przejść do historii sesji, aby zobaczyć listę strzałów i arkusz wyników.
Jeśli chcesz usunąć wszystkie swoje dane, przejdź do ustawień, edycji profilu i usuń swoje konto.
Aby eksportować wideo z aplikacji, przytrzymaj wideo.
🔸 Kliknij „Udostępnij w Aktualnościach”, aby podzielić się wideo z innymi strzelcami w aplikacji.
🔸 Kliknij „Udostępnij”, aby udostępnić na mediach społecznościowych (na przykład na Instagramie lub TikToku). Możesz udostępnić wideo na swojej stronie lub w wiadomości prywatnej.
🔸 Kliknij „Zobacz w aktywności”, aby przejrzeć odpowiednią sesję treningową.
🔸 Click „Save video” to download it.
🔸 Kliknij „Usuń”, aby usunąć nagranie z aplikacji.
Należy pamiętać, że wideo musi zostać przetworzone przed eksportem. Może to zająć kilka minut.
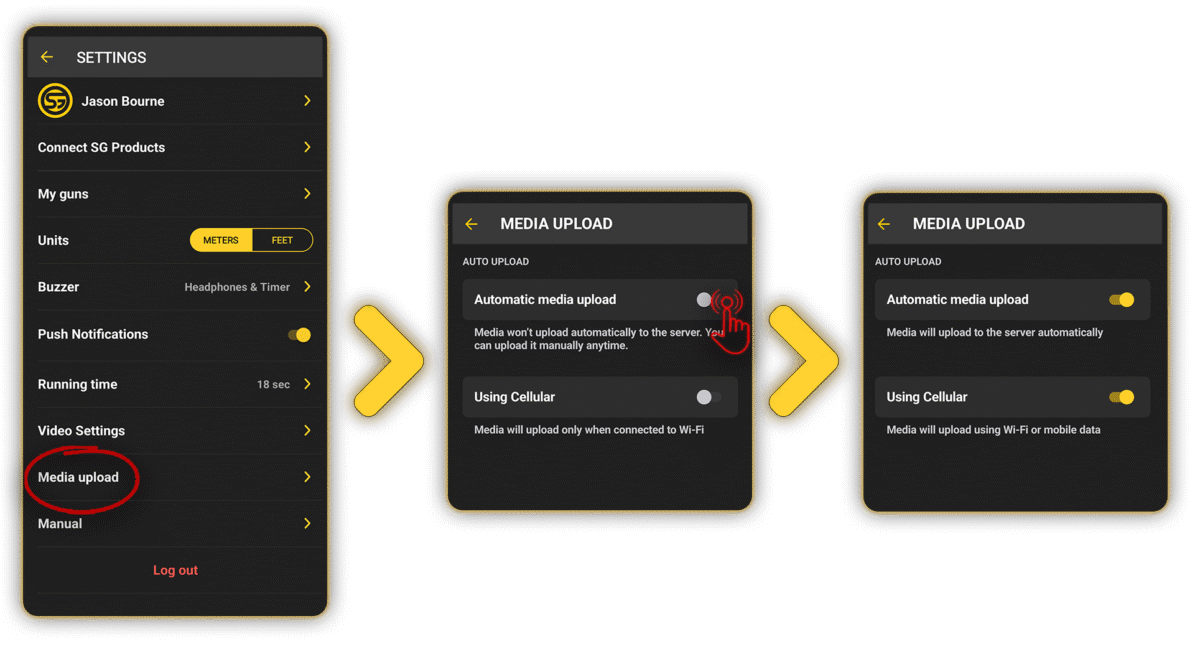
📤 Ustawienia przesyłania mediów
Po nagraniu wideo zostanie ono automatycznie przesłane do chmury. Zwolni to miejsce na Twoim urządzeniu i pozwoli na udostępnianie filmów innym użytkownikom w trybie meczu.
Możesz wyłączyć tę funkcję lub ustawić przesyłanie tylko po połączeniu z Wi-Fi.
W ustawieniach aplikacji przejdź do Przesyłania mediów.

🔧 Jak to działa:
🔸 Obie opcje WYŁĄCZONE → Media są przesyłane ręcznie przez kliknięcie ikony przesyłania w sekcji Media i tylko wtedy, gdy jest połączenie Wi-Fi.
🔸 Automatyczne WŁĄCZONE, transmisja komórkowa WYŁĄCZONA → Media są przesyłane automatycznie, ale tylko przez Wi-Fi.
🔸 Obie opcje WŁĄCZONE → Media są przesyłane automatycznie, priorytetowo przez Wi-Fi. Jeśli Wi-Fi jest niedostępne, przełącza się na dane komórkowe.
🔸 Automatyczne WYŁĄCZONE, transmisja komórkowa WŁĄCZONA → Przesyłanie pozostaje ręczne. Jeśli Wi-Fi jest dostępne, będzie używane. Jeśli nie, zostaną użyte dane komórkowe.


