✨ Shotisize is a new AI powered feature in a Drills app, which allows you to create a video with shot time overlay, using a raw video filmed with any recording device and any shot timer. Even one not made by Shooters Global.
📱 Open the Drills App, go to your Gallery, and hit the Shotisize button.
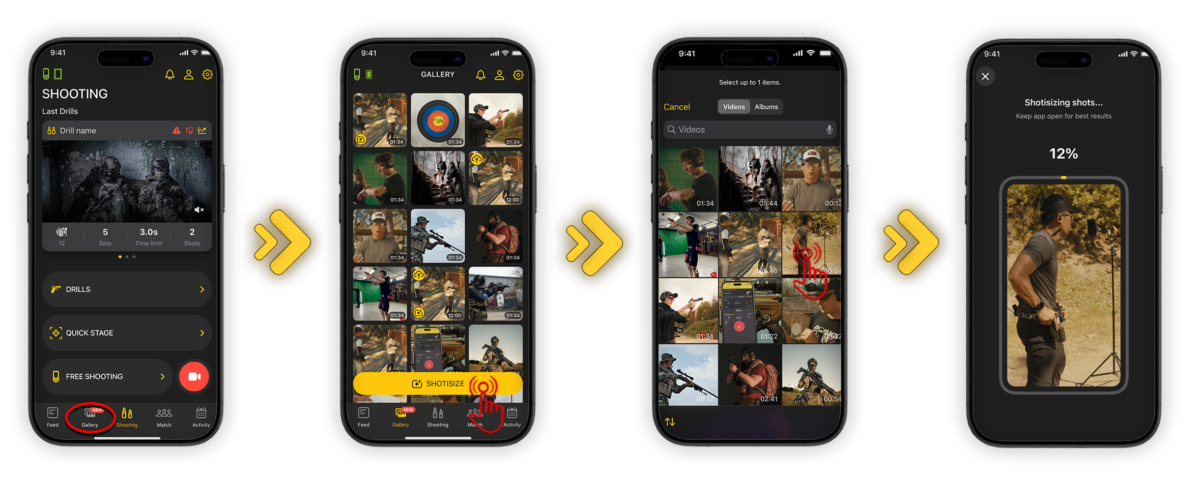
Your video should be 3 to 180 seconds long, and include a clear audible start signal and shots. Both vertical and horizontal videos are supported. 🎥
Once you select a video, the app will begin the analysis 🧠. Please stay on this screen until the process is 100% complete.
⚠️ Make sure your phone has enough free space – ideally three times the size of your original video. For example, if your video is 400 MB, you’ll need about 1.2 GB of free space available.
After the analysis is complete, you will enter the Shotisize Editor. ✏️ Here, you can review the AI’s detection and fine-tune your results.
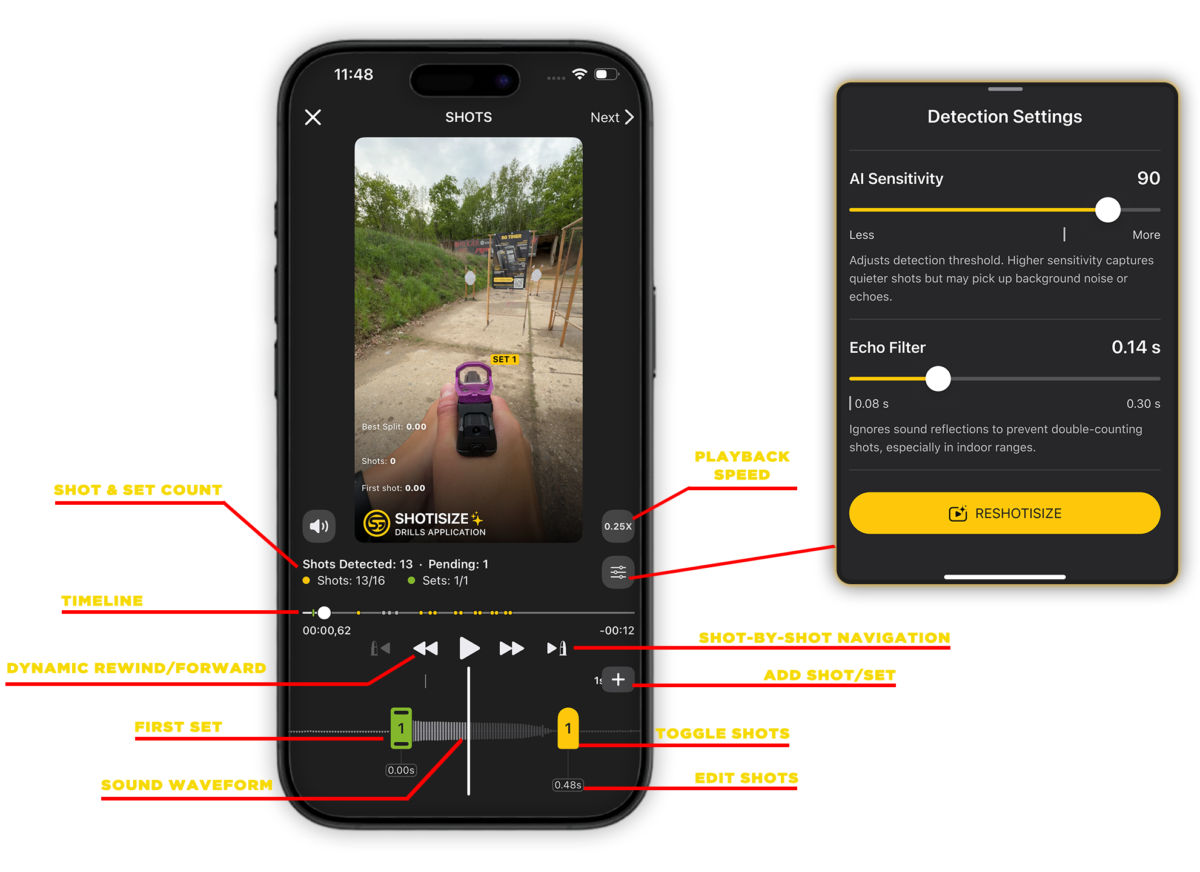
⏯️ The video player is in the center, with the following controls below it:
- Shot & Set Count: View the total number of detected shots and sets.
- Timeline: Slide your finger along the timeline to move through the video frame-by-frame.
- Dynamic Rewind/Forward:
Single Tap: Skip through the footage quickly.
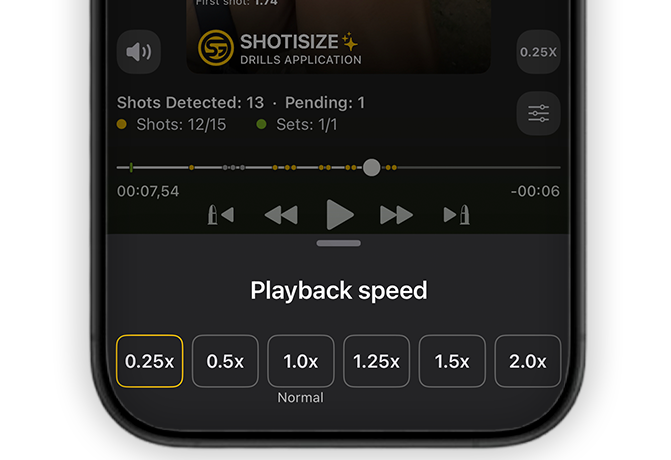
Long Press: Increase playback speed ( 1.0x, 1.25x, 1.5x, 2.0x, 3.0x). The speed ramps up every second you hold it.
You can also playback the video at different speeds – such as 0.25x slow motion – to gain a more detailed understanding of exactly where the shots occurred.
- Shot-by-Shot Navigation: Use the Rewind/Forward icons to jump precisely from one shot to the next.
Below the timeline, you will see a list of all registered shots.
- Toggle Shots: Tap any shot to disable or enable it.
Once a shot is disabled, the shot numbering, splits, and total time will automatically update in the overlay.
Long-press a set to disable it along with all the shots it contains.
🤔💭 If the initial analysis isn’t perfect, go to Detection Settings to adjust the parameters.
- Sensitivity: This works like the adjustment on a physical shot timer, ranging from 50 to 100. Higher sensitivity picks up quieter shots but may catch background noise or loud echoes. Lower sensitivity filters out noise but might miss faint shots. You can always disable the false shots but you can’t add new ones manually.
- Echo Filter: Recommended for indoor ranges, this ranges from 0.08 to 0.30. It helps the AI ignore sound reflections to prevent “double-counting” a single shot.
⚠️ Please keep in mind that factors like wind, recording quality, or range type can affect the AI. If the results are off, tweak these sliders and tap Reshotisize to recalculate. Note that Reshotisize will remove your manually added shots and sets.
You also have the flexibility to manually add a missing shot, set, or beep. To add a shot, simply navigate to the desired point on the timeline, tap the + icon, and select Shot or Set.
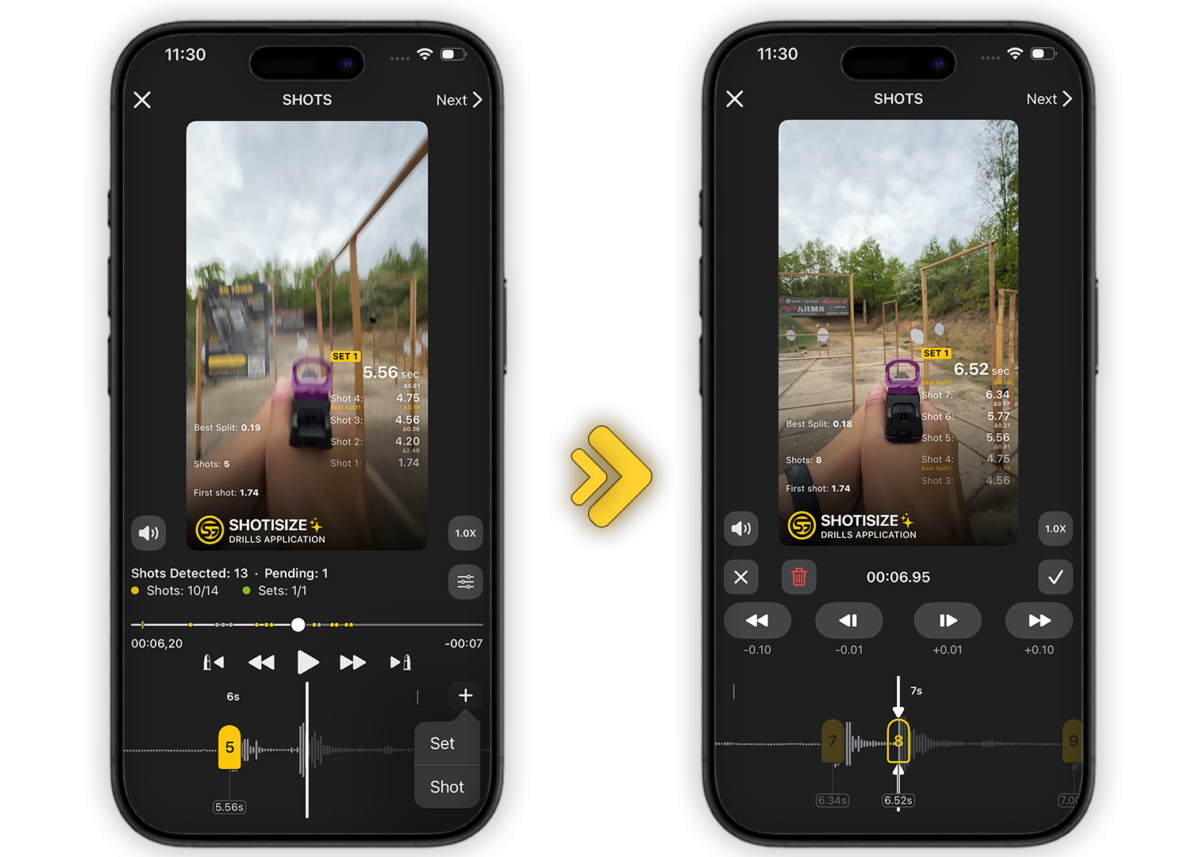
Each shot displays its specific timestamp directly below it. By tapping this time value, you can edit its placement on the timeline by shifting it in increments of 0.01 or 0.10 seconds. Once you have achieved the desired precision, tap the checkmark to lock the shot at that exact moment on the timeline.
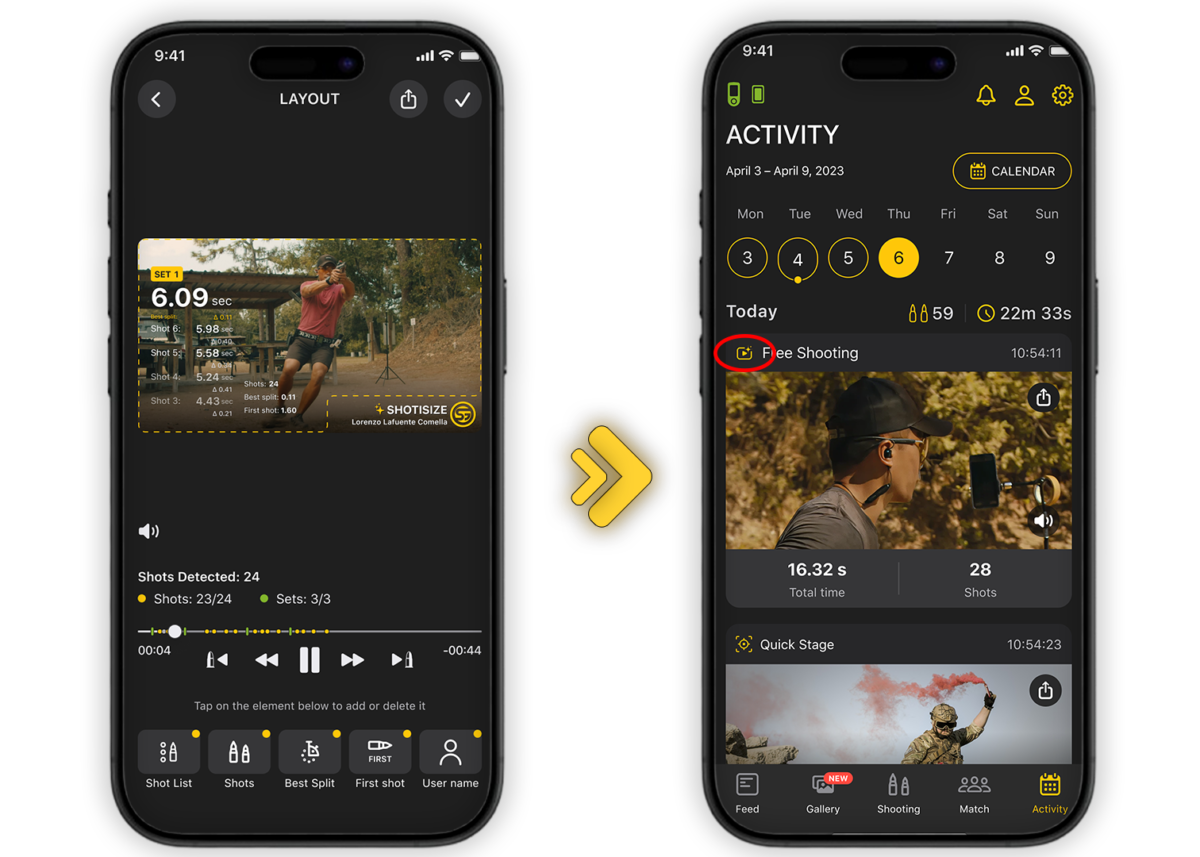
⌞ ⌝ Finally, use the Layout screen to choose which data to display and where to place it. With your layout set, you have two options. Tap the Checkmark to sync the session to your Activity and Stats, which also saves the video to Gallery. In Activity, Shotisize sessions are easy to spot by the distinct icon on the session info.
Alternatively, if you only need the video file without adding it to your training history, use the Export icon to save it locally or share it to social media. After that, you can simply exit Shotisize – the video stays on your phone, but your stats won’t be affected.