Introduction
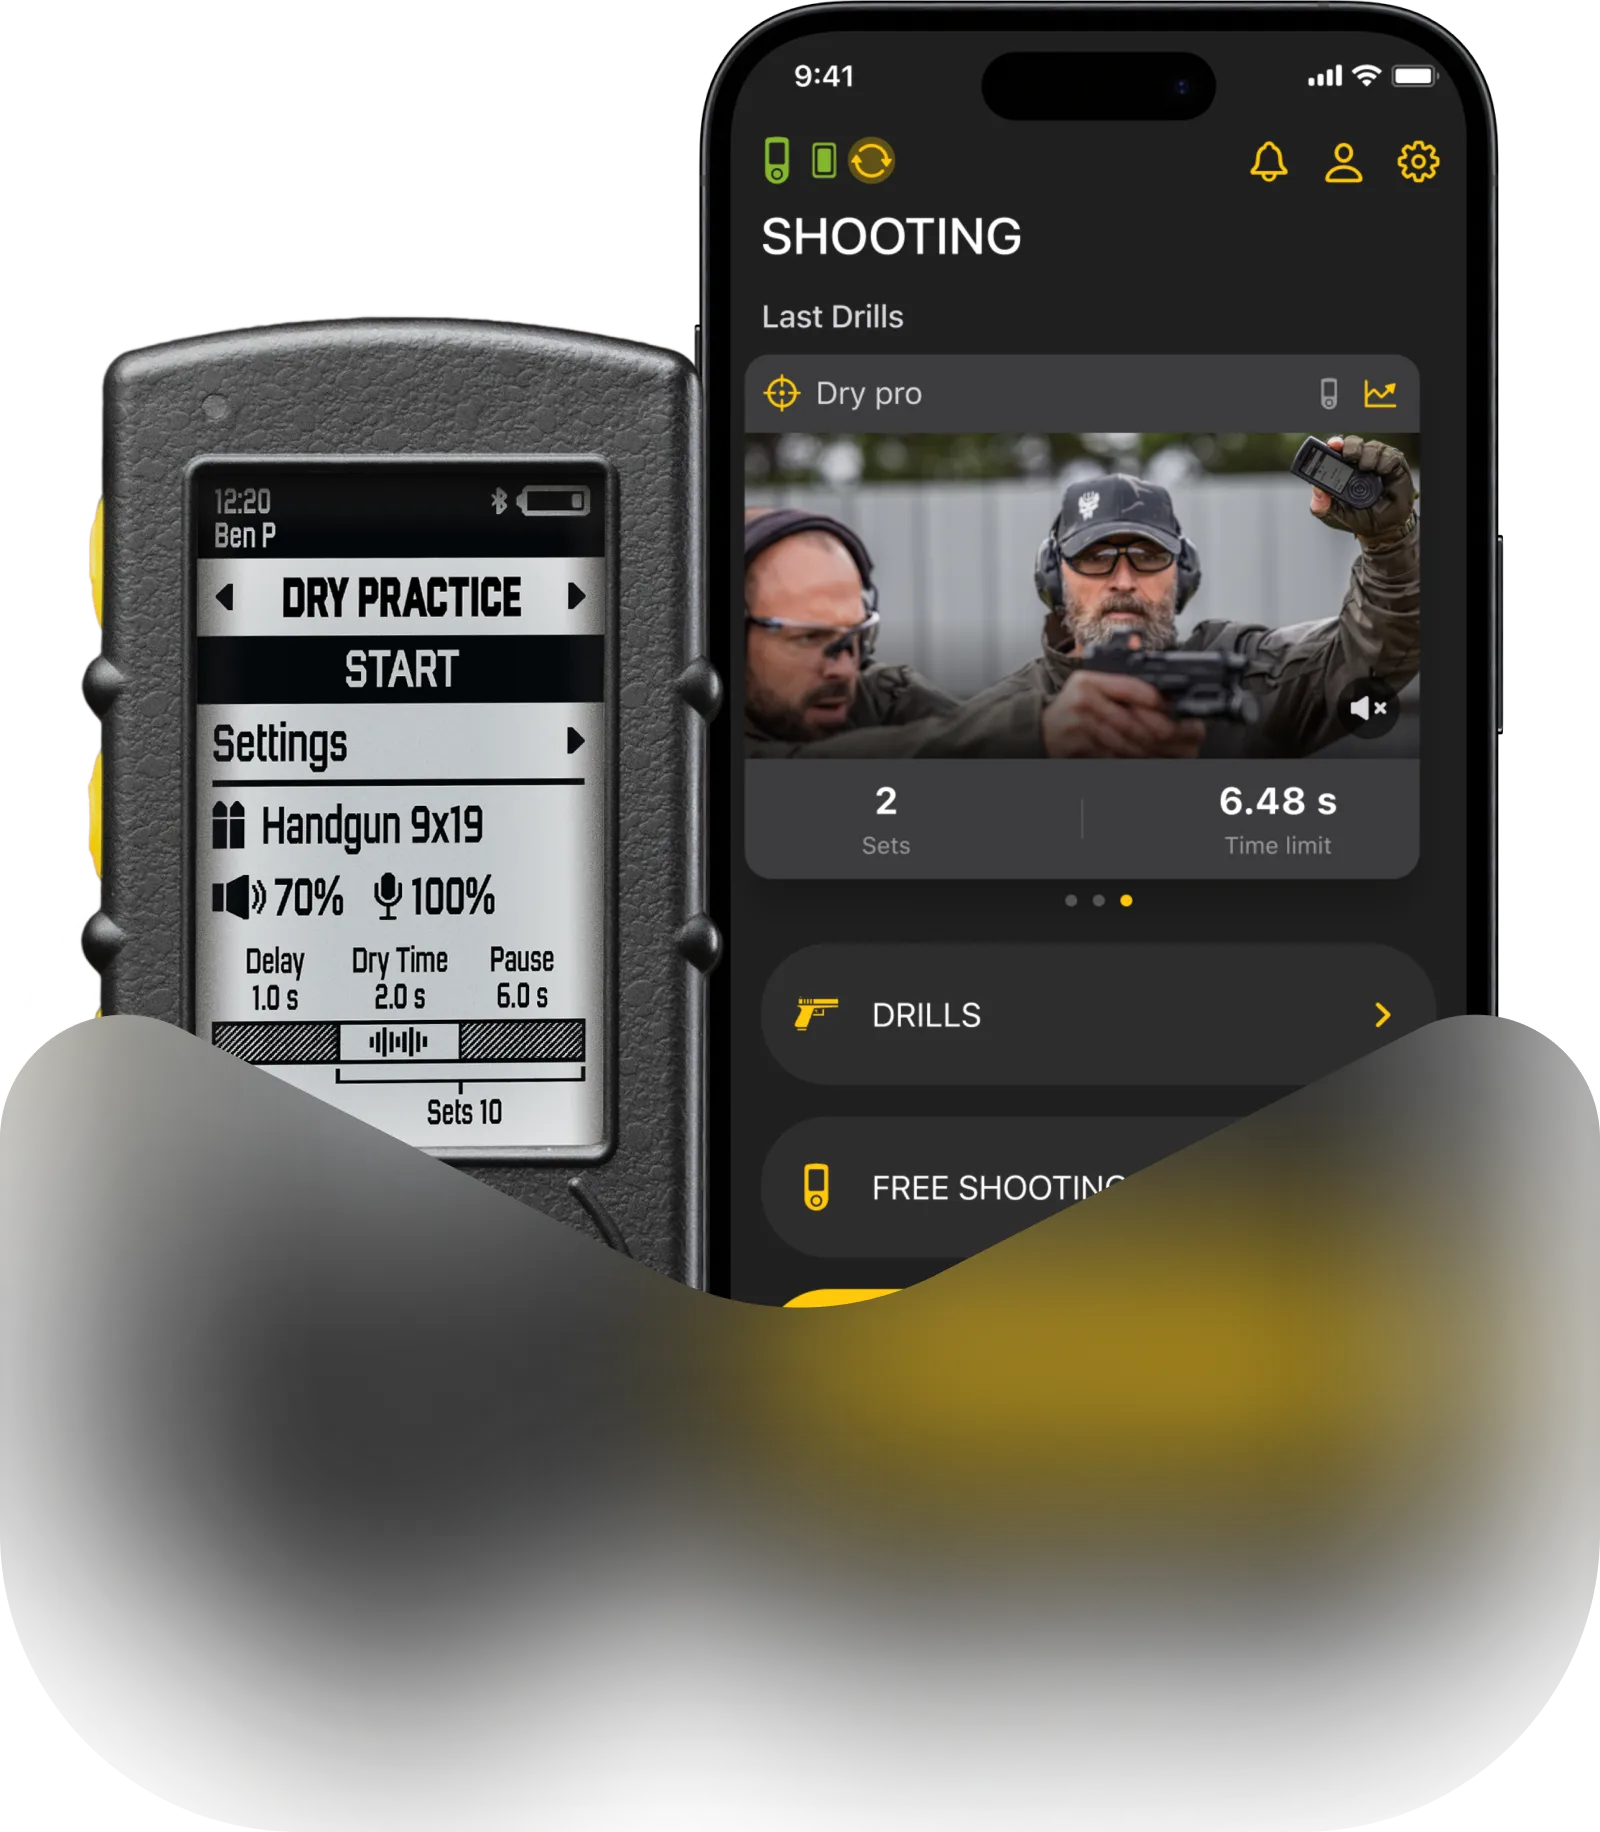
Drills menu allows you to create custom dry fire and shooting drills and monitor the progress of this specific drill over time. It’s available on SG Timer/2 and SG Timer GO.
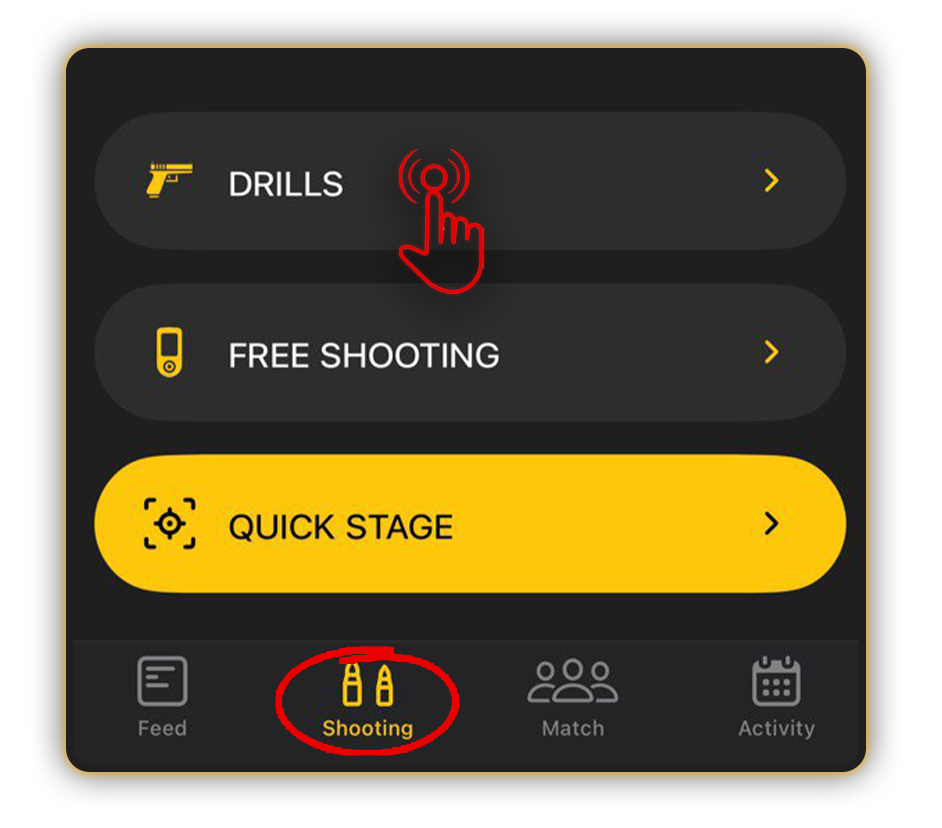
While in the “Shooting” menu, open Drills.
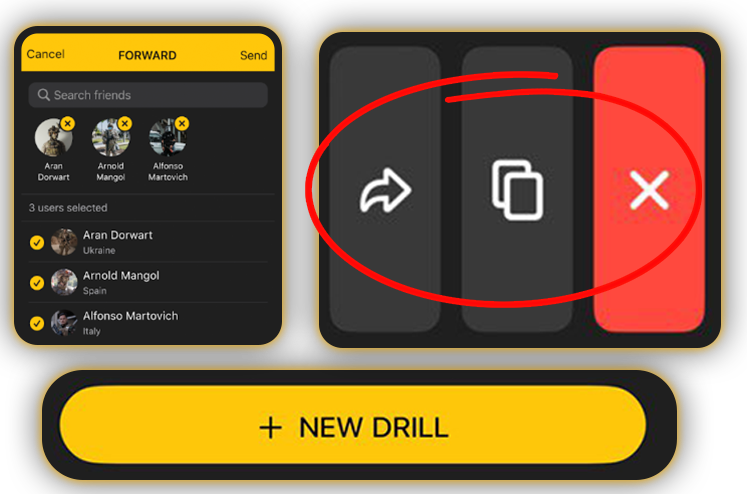
The Drills menu is your personal training ground. Here, you can create, delete, share drills with friends, and even duplicate them.

You can create up to 200 custom Dry fire and Shooting drills for personalized training.
Once you have created and displayed six drills, a search bar will appear on this screen, allowing you to enter the name and find the desired drill.
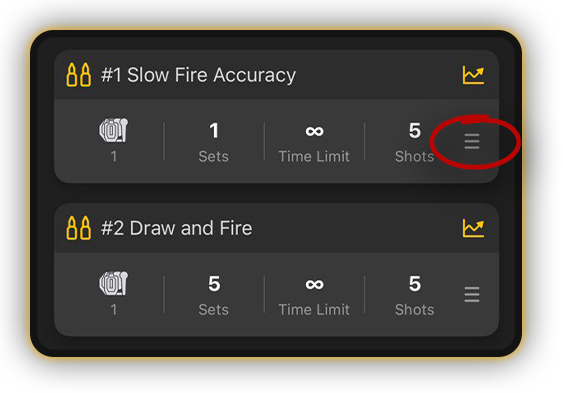
You can rearrange the drills in a list by dragging them by the icon with 3 dots.
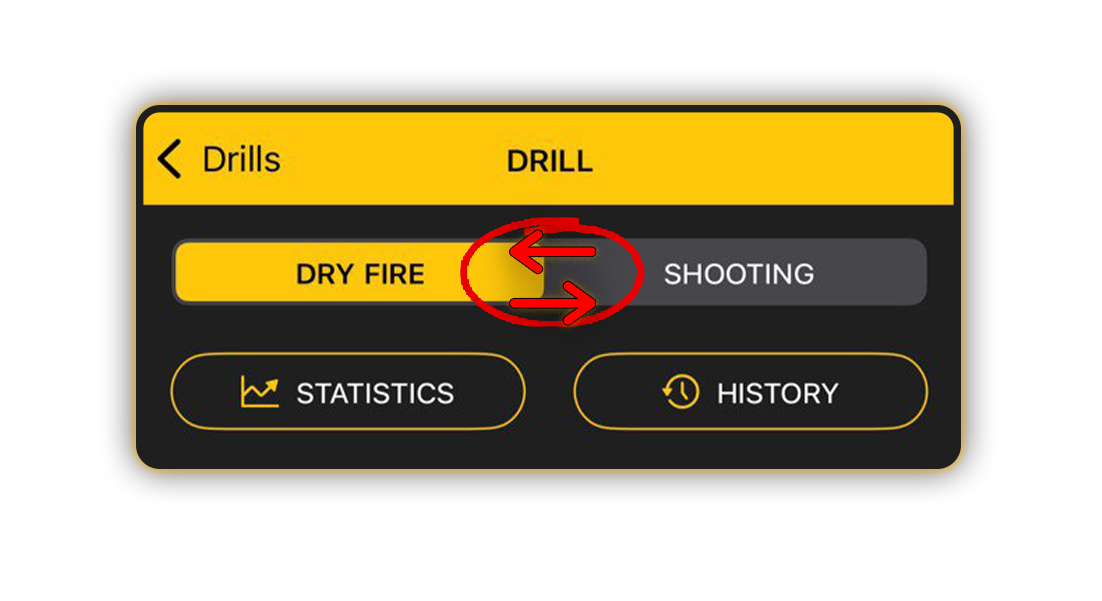
Use the toggle on top to switch between dry fire and shooting drills.
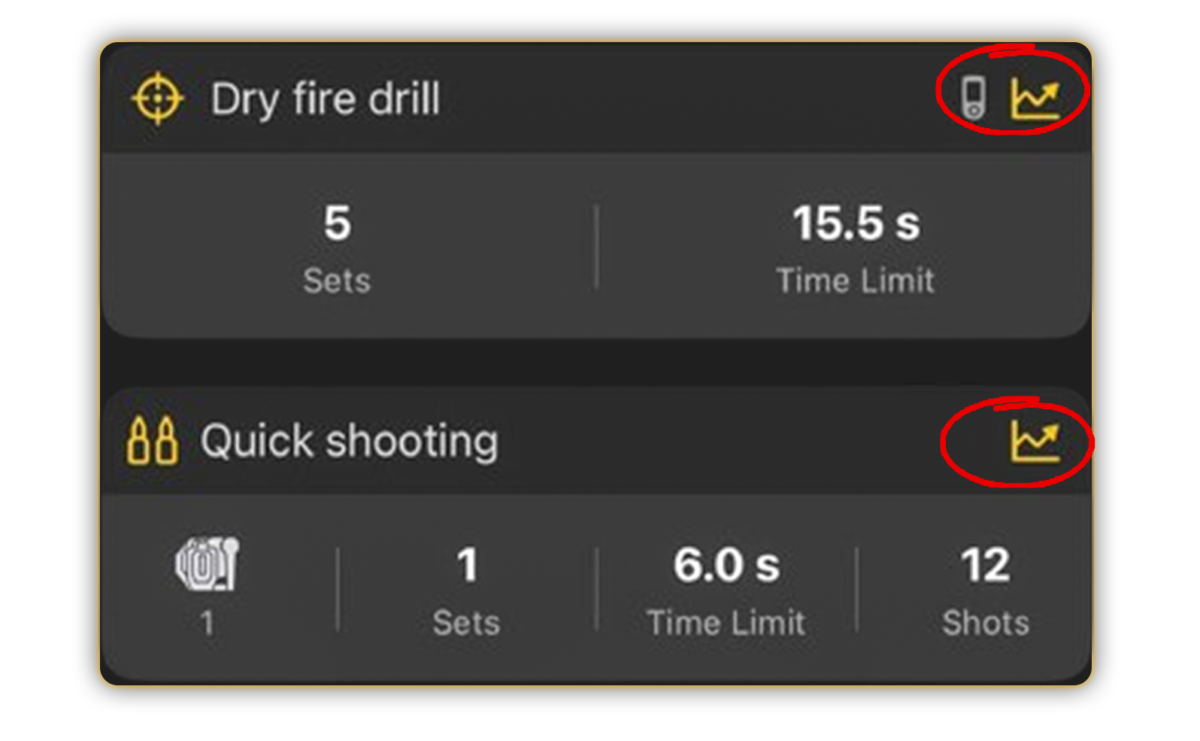
After you run the drill at least once, a chart icon appears on the card.
By tapping on it, you can access detailed statistics for this drill.
In the Shooting menu, you’ll also find the last three Drills you completed, along with video sessions if they were recorded. Tapping on that card will take you to the specific Drill’s menu.
Creating Drills
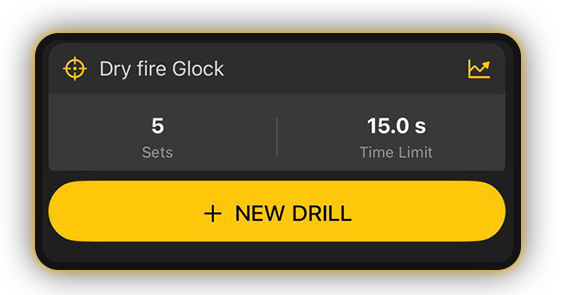
General setup. To create a new Drill tap “+ New Drill” to open the setup screen. Customize it or use the default settings.
Choose Drill type: Dry Fire or Shooting.
You can switch between these modes, but only during the initial setup.
⚠️ Once the Drill has been completed for the first time, this option will be locked, and only the selected mode will be displayed.
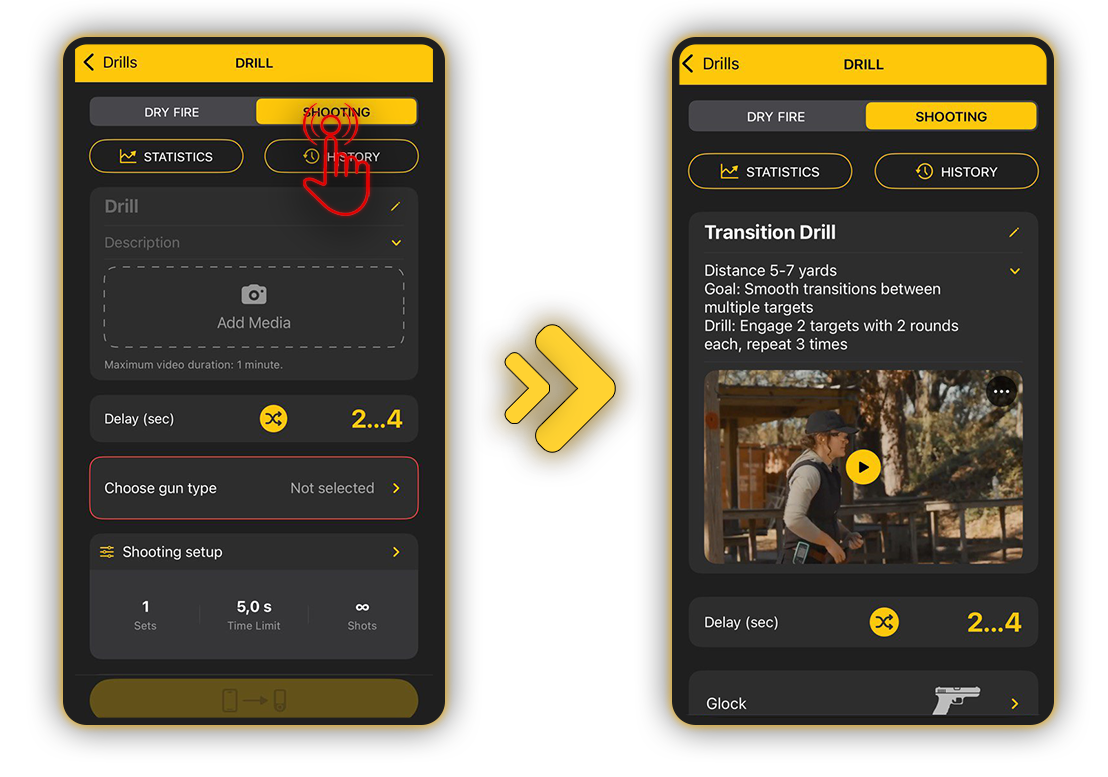
Let’s create a Shooting Drill. To do so select the Shooting tab.
To personalize your drill, enter a name, optionally add a description, and upload one photo or video (up to 1 min).
Gun type
To select your gun type, open Gun Type and pick one from the list. Gun type is defines your sensor settings like sensitivity, volume and echo filter.
To learn more about Gun Types read this guide.

Your configured settings appear in the Timer Settings window. The settings from the selected Gun Type will be applied automatically, but you can adjust them if needed.
⚠️Please note that this will overwrite the Gun Type settings in all drills where this gun type is used.
Programming settings/PAR time
To set the start Delay, choose between random, instant or a custom time.
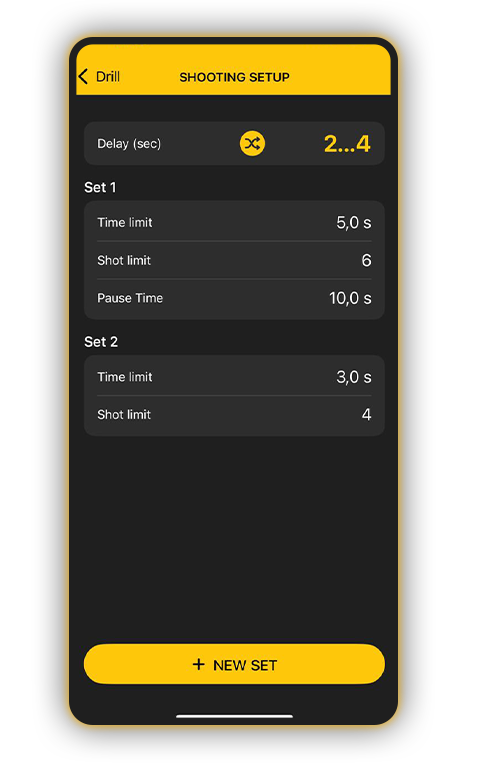
In “Shooting setup” you can customize your PAR times. It is the program that the timer will follow.
It’s basically the same sets, shots and time limits as in “Free Shooting”, but now you can program each set individually, allowing you to create complex shooting courses.
Before you could only set a shot and time limit, and program the timer to repeat this sequence. You now have the flexibility to program each individual set to your liking.
For example:
Set 1
Time limit is 5 sec
Shots limit is 6
Pause time is 10 sec
Set 2
Time limit is 3 sec
Shots limit is 4
The timer will give a start signal and count down 5 sec for you to shoot. If you make 6 shots under 5 sec, the timer will automatically give an end signal and start counting down 10 sec for you to reset (it will not capture shots). Then it will give a start signal again and count down 3 sec. After 3 sec it will give an end signal and finish the drill, assuming there are no more sets.
This will count as 1 shooting session.
⚠️For example if you set a 5 sec time limit and 6 shots and don’t make all shots in time, the timer will give an end signal after 5 sec, but will continue to listen for shots for 2 more seconds for penalty shots. The set will not end until you fire all shots or wait for 2 seconds after the last shot.
If you haven’t set the shot limit, the timer will continue capturing shots as long as you continue shooting.
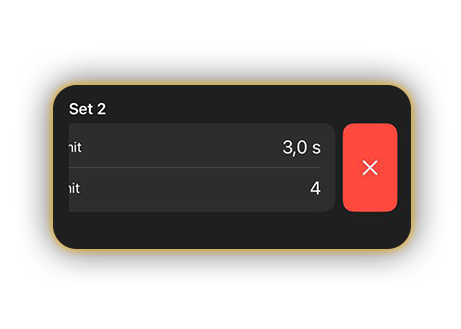
To delete an unwanted set, swipe left and tap on the red cross button (“X”).
In the Stages & Targets window, you can set up targets for your drill. Choose a simple target setup like in Quick Stage or add a fully designed 3D stage where all targets are pre-configured.
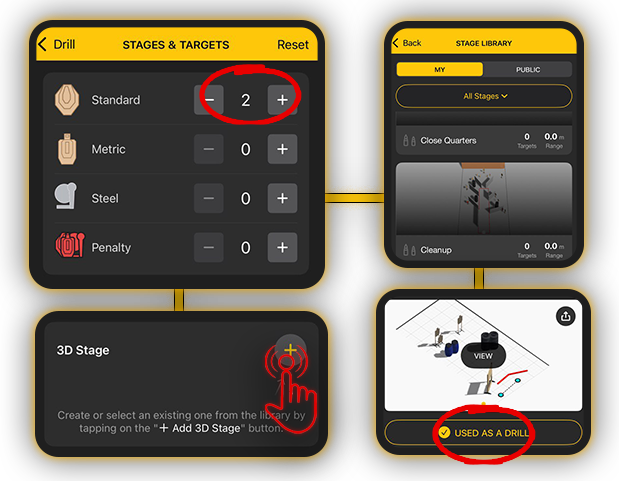
Tap “Add 3D Stage” to open the Stage Library, where you can browse and add a stage to your drill. You can also select an existing stage you’ve used before. But that’s not necessary, you may just stick with the targets itself.
Learn more about Stage Builder 2.0 here.
! If you don’t select the targets, the Drill will be incomplete and will not track your accuracy and hit factor in the app.
Creating a Dry Fire Drill is very similar to creating a Shooting practice. Enter a name, add a description, set a delay, choose your gun type, and configure your Dry Fire Setup.
The key difference from Shooting practice is that Dry fire doesn’t have the complex par time setup. You can set only 1 set and number of repetitions of this set.
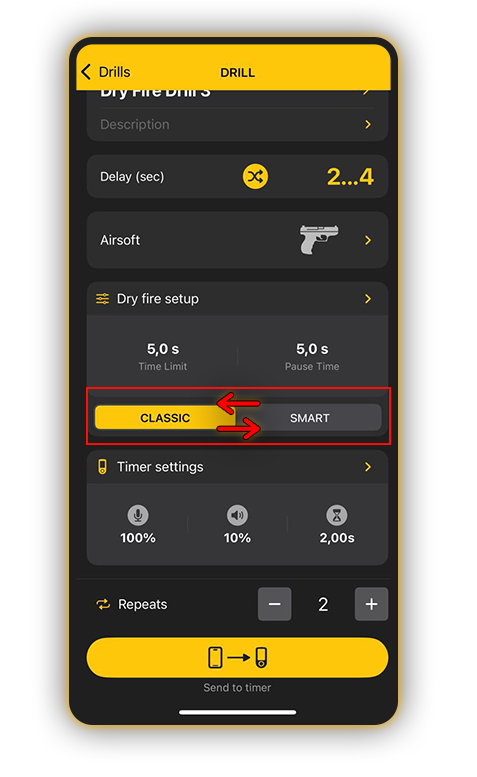
For Dry Fire, there are two modes available: Classic Dry Fire and Smart Dry Fire.
Smart Dry Fire detects the sound of the hammer fall.
Classic Dry Fire enables cycling in a repetitive PAR mode without sound detection.
Syncing Drills with SG Timers
Once you created your drill, tap Send to Timer to sync the drill with your SG Timer.
To learn more about Drills interface in SG Timers, go to SG Timer 2 or SG Timer GO.
To choose which drills will be stored on the timer, tap “In Timer.” A list of your created drills will appear on the screen.
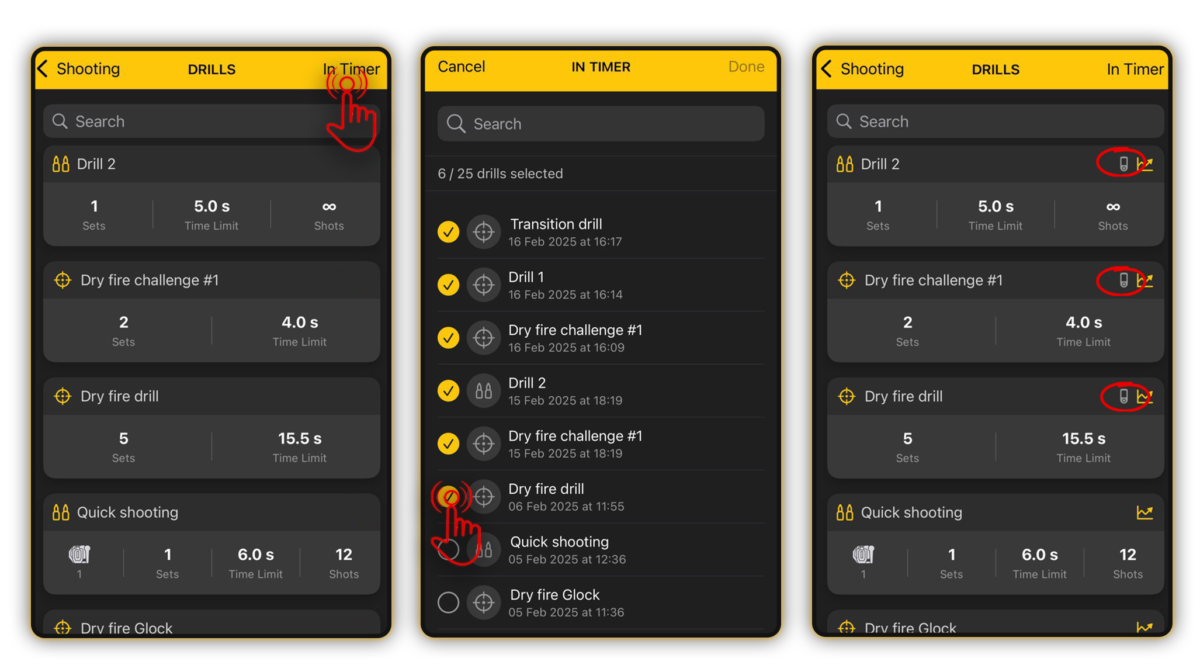
Note that the Timer can store up to 25 drills at a time, but you can store up to 200 in the app.
To transfer them to the timer, check the box next to the desired drills and press “Done.” The selected drills will then be displayed on the timer. The timer icon will be displayed on the drills present on the timer.
If a drill has been deleted on the phone, then during synchronization, it will also be deleted from the timer and replaced with new ones if they have been selected for the timer.
If there are already 25 Drills on the timer, the new Drill replaces the oldest one, which is deleted from the timer but remains saved in the App.
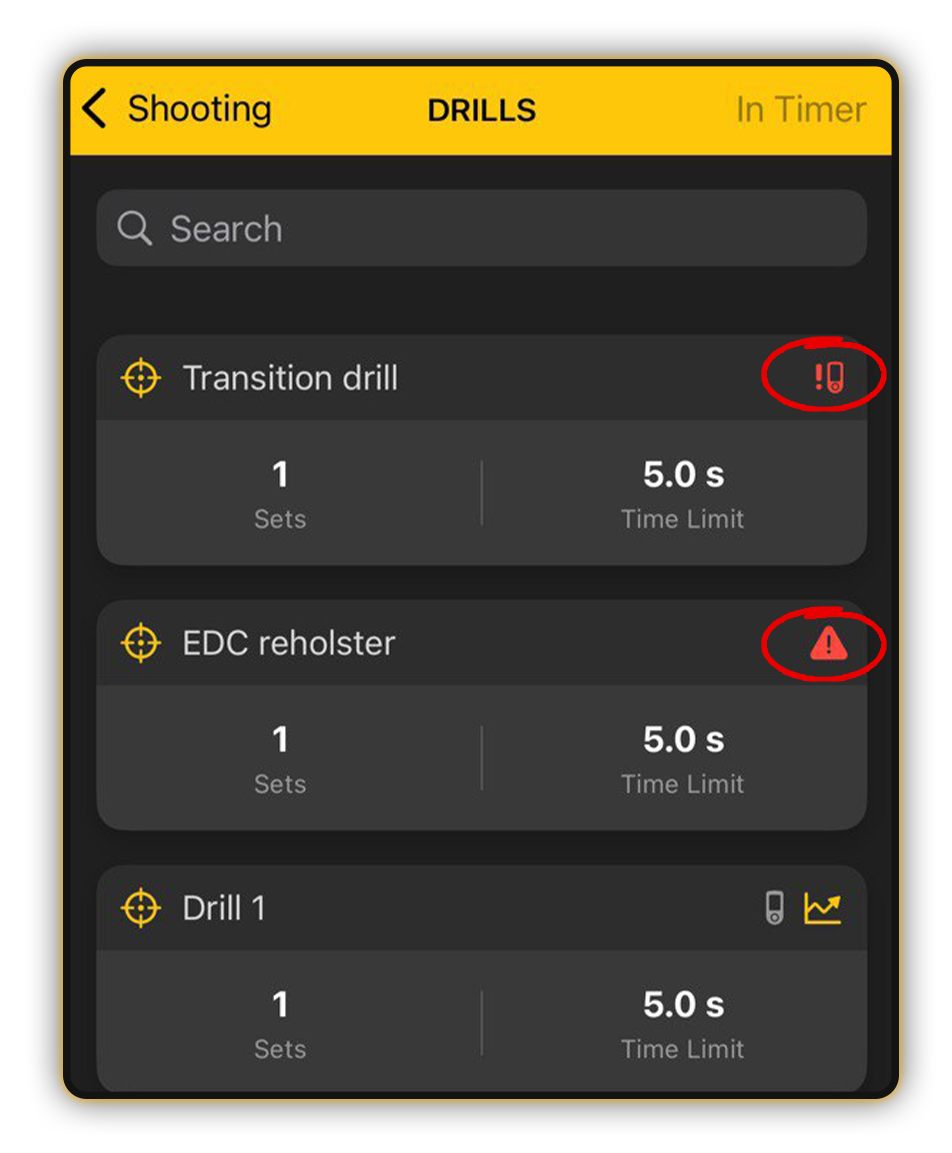
Note that new icons may appear on the Drills cards to help you identify important statuses:
Attention: Indicates incomplete or misconfigured drills (e.g., missing gun type or mismatched shots/targets).
Sync. Timer: Shows when changes to the drill need to be synced with the timer. Once synced, the icon disappears, ensuring your settings are up-to-date and ready for use.”
Starting a drill
Tap Start, or Video if you want to record your session.
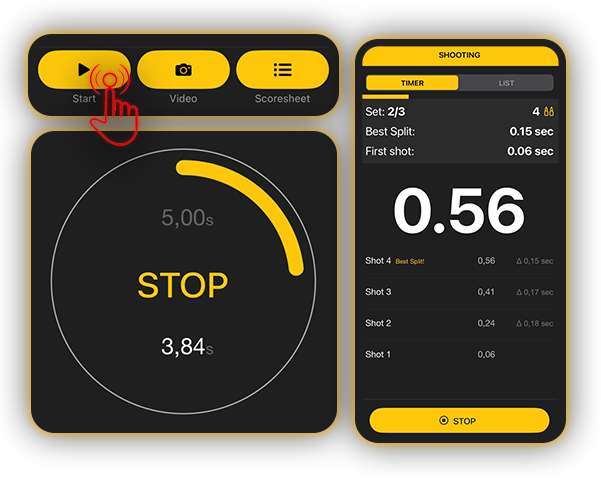
After completing the drill, you’ll have the option to fill out the Scoresheet on the timer or in the app.
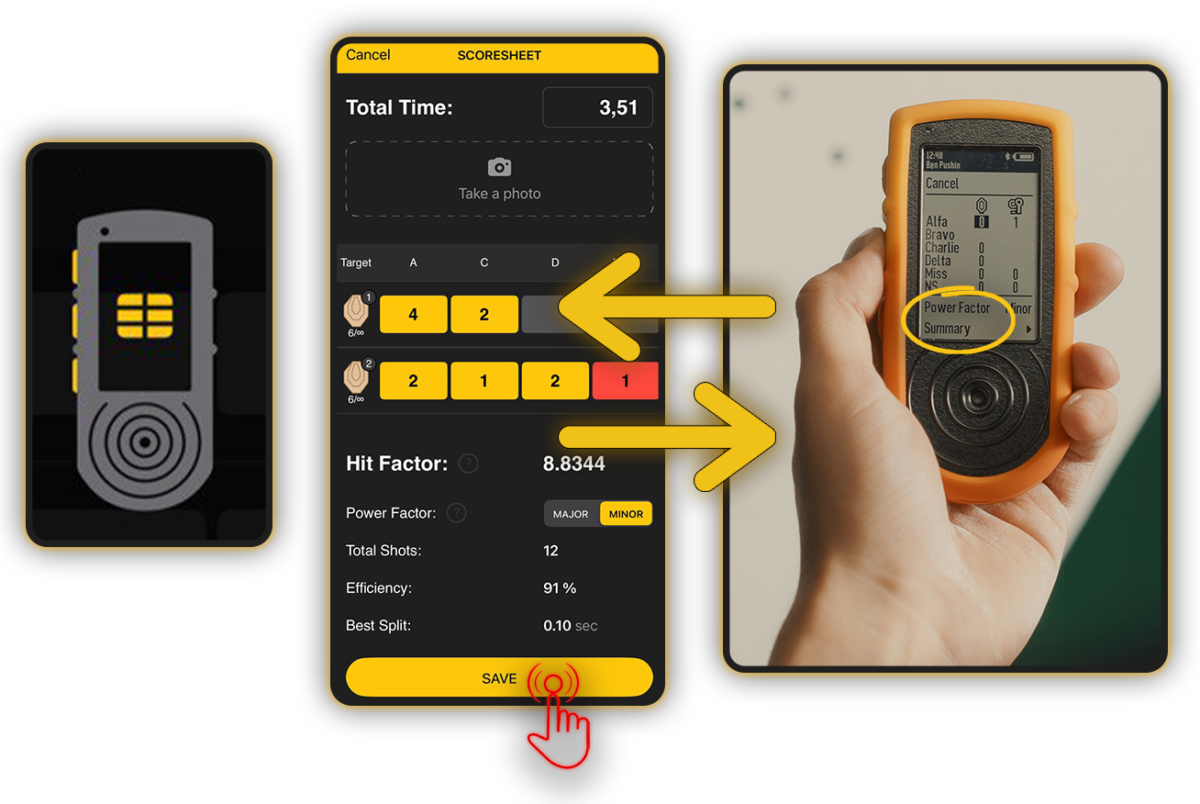
🔸 If you’re using the timer, mark your hits with the middle button. To erase the input, press and hold the middle button. Select Summary and then Save to reflect the changes on your smartphone.
🔸 If you’re using SG Timer GO, you can mark the hits only in the app.
🔸 If you prefer to fill out the Scoresheet on your phone, tap Cancel on the timer. Mark your hits. To reset, tap and hold the box until it becomes gray again.
Here you can also adjust your time manually and take a photo of the target if needed. Tap Save to store your results.
Once you complete this Drill for the first time, be careful modifying targets or sets configuration, as it may mess up the graphs in the statistics.
You can also adjust the time limit if you don’t feel challenged.
To learn more about Drills on SG Timers, go to this Guide.