Previously, creating a shot telemetry overlay required recording your runs exclusively through the built-in camera function of the Drills app. With our latest update, this restriction is gone.
Now, you can seamlessly match any pre-recorded video with your existing training history. Whether you captured your stage on a GoPro, Insta360, a professional media camera, or simply used your phone’s native camera while your timer was running, you can easily sync that footage with your data. This functionality allows you to transform raw video into a precise, data-driven analysis tool after your training session is complete.
⚠️ Note: This feature is available only with a subscription. However, you can try it out for free with a trial period. Available for sessions recorded in:
✅ Free Shooting;
✅ Shooting Drills;
✅ Dry Fire Drills.
There are two ways to find the session you want to upgrade with video:
Option A:
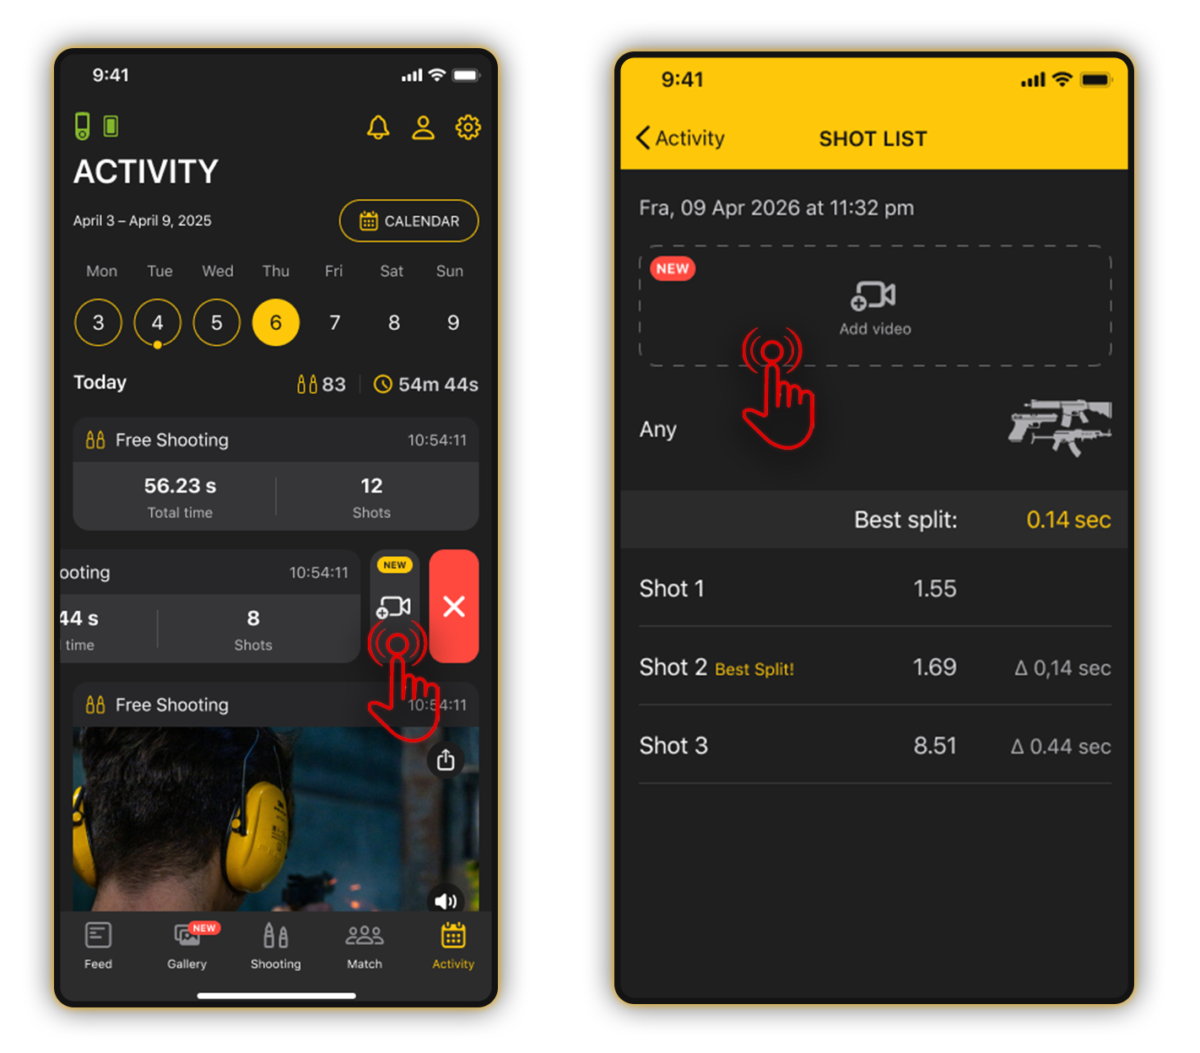
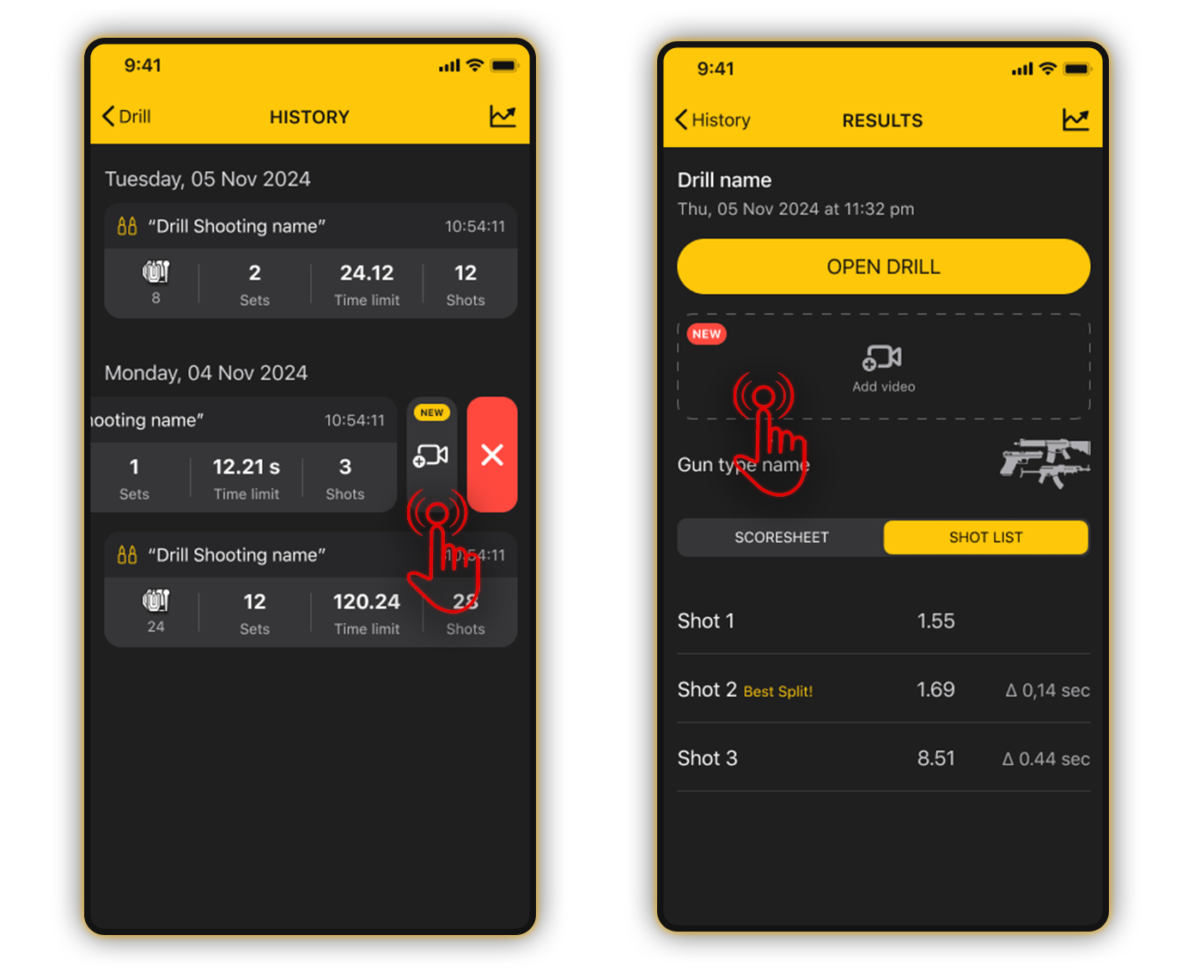
Option A: Open the Drills App and head to the Activity tab from the main menu. Find the specific session you want to analyze, then either swipe left on the session to reveal the “Add Video” button, or simply tap into the session history to find the button inside.
Option B:
Go directly to Dry Fire or Shooting Drills from the main menu, open your training history there, and pick the session you need.
Once you are in the session, simply tap the Add Video button.
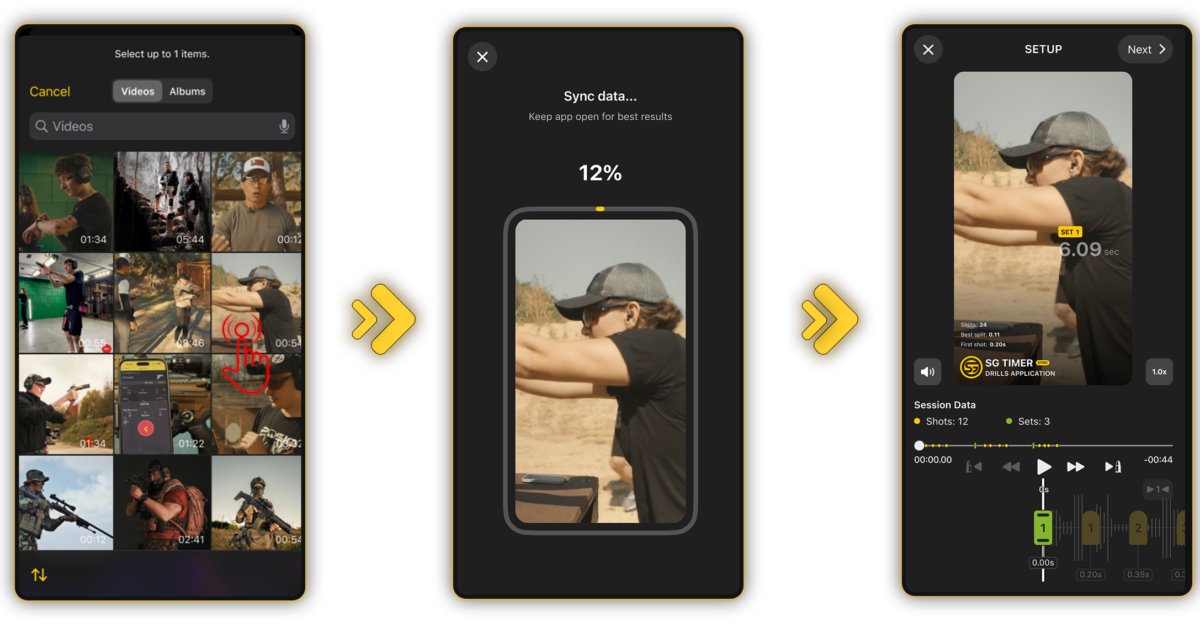
Choose the video from your gallery. To ensure a seamless sync, please note the following requirements:
⏱️ Duration: The video must be between 3 seconds and 5 minutes long;
🏁 Completeness: The video must cover the full shooting session captured by your SG timer. It cannot cut off before the final shot recorded in that session;
📢 Audio: Make sure the video audio is clear, as the app will automatically scan the footage to detect the timer’s start beep.
Alignment & Editing (The Timeline)
Once selected, the app will process the footage, and the Editing Screen will appear. Your sets, shots (or dry fire repeats), and data arrays will automatically appear on the timeline.
⚠️ Important Note on Data Integrity: You cannot delete, add, or individually move individual shots along the timeline. Why? Because this is hard data locked in by your shot timer during the actual run. To keep your analytics clean and honest, individual shot positions are fixed relative to each other.
However, if the app’s auto-detection missed the exact start mark, you can manually shift the sets to align them perfectly with the buzzer:
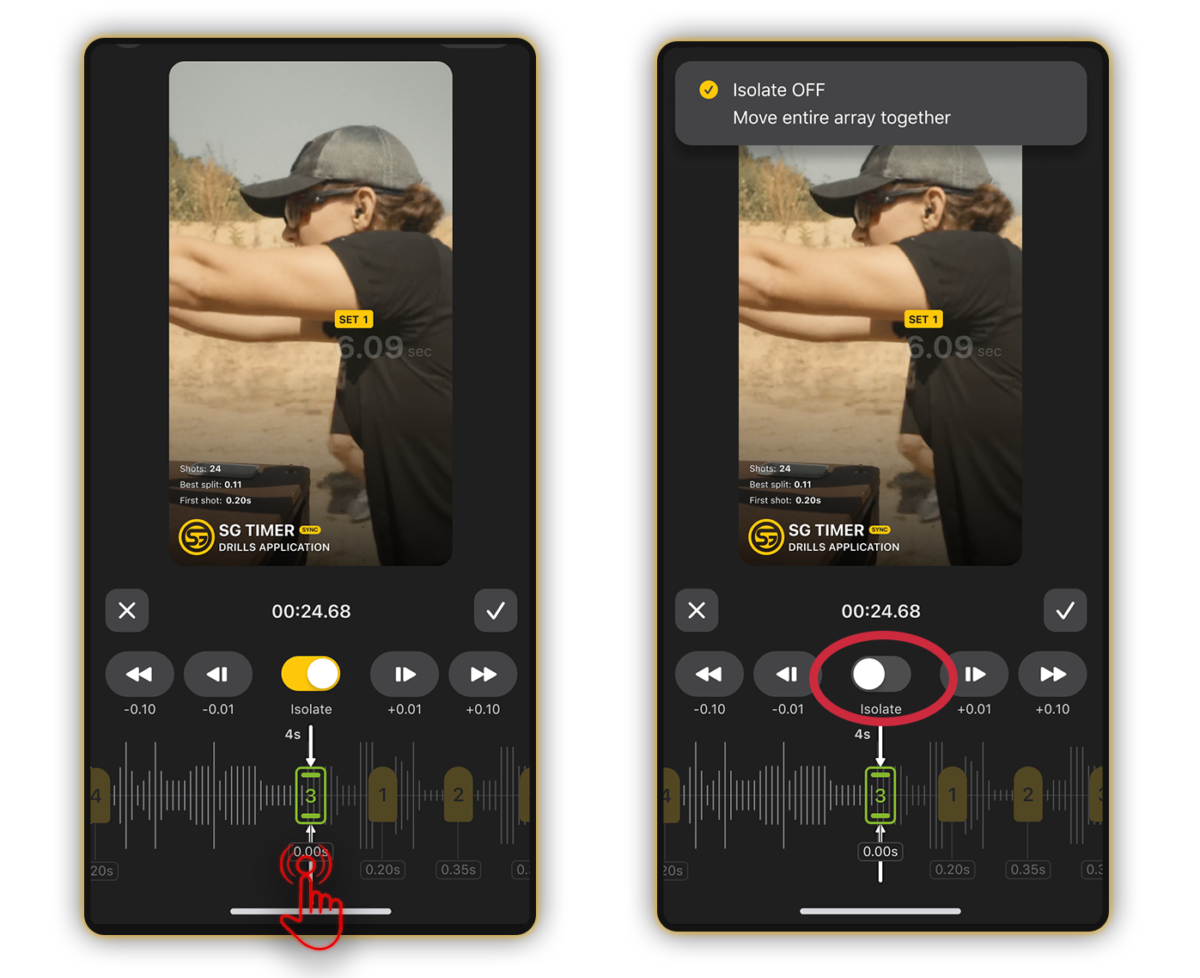
➤ Fine-Tuning: Tap the timestamp below the set number. You can nudge the entire data array forward or backward in precise increments of 0.01 or 0.10 seconds.
➤ Quick Alignment: If your video has a long intro and the actual shooting starts much later, scroll the video to the exact moment of the start signal, and tap the “1” button. The beginning of the session data will snap instantly to that specific frame.
➤ Isolating Multi-Set Sessions: If your history contains multiple sets with varying pause times between them, tap the Isolate button. This allows you to independently move a single set to its exact spot. Unchecking Isolate locks all sets back together, allowing you to move the entire session array simultaneously.
To ensure your splits and transitions line up frame-by-frame with your mechanics, use the playback tools:
⚡️ Speed Control: Play back your video at 0.25x, 0.5x, 1.0x, 1.25x, 1.5x, or 2.0x speed.
💥 Shot Navigation: Tap directly on any shot icon on the screen to instantly jump to the exact frame of that specific shot.
Customize Layout & Export
Once your data and video are perfectly synced, tap Next.
- Customize Your Overlay: Choose your preferred layout configuration to display exactly the metrics you want your audience (or coach) to see.
- Save & Share: Export the video directly to your phone’s gallery, share it to your social media, or save it permanently to that session’s history within the app.
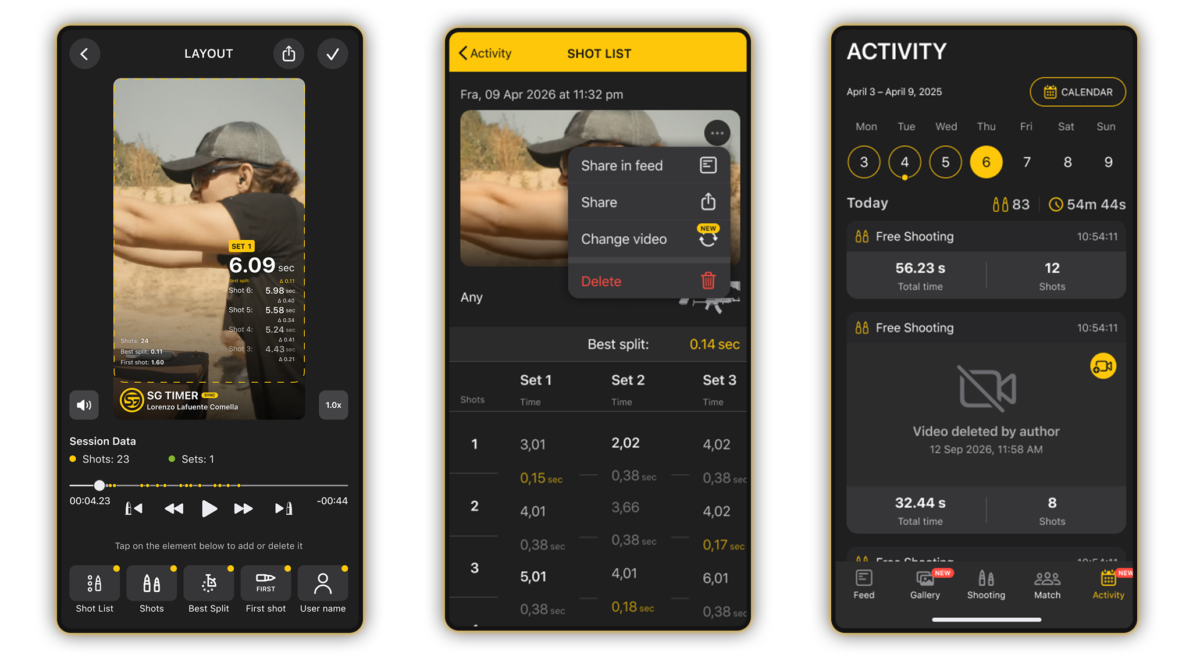
⚠️ Note: You can remove the video from your session history at any time.